All Things Gypsum: Dealing with Shoulders and Ridging
Gypsum wallboard has become the most commonly used building material for finishing interior surfaces. It can be decorated with any number of materials, but it is usually decorated with either paint or wall covering. Sometimes the
decorating products mask surface irregularities, and sometimes the decorating products (e.g., glossy paint or reflective wall coverings) can accentuate those irregularities.
Often, a wallboard job will be specified before the final decoration is known, and instead of calling for the most all-encompassing level of finish (a Level 5 gypsum board finish), the specifications will call for the next step down (a Level 4 gypsum board finish). Wallboard finishers who conclude that a specification for a lower level of gypsum board finish indicates that the decorating material will mask surface irregularities can be in for a severe and expensive lesson.
A commonly used quick-and-dirty field test to check how significantly these humps protrude above the plane of the surface is to place the middle of a straight edge, typically a four-foot level, on the high spot of a dried-in joint. The straight edge is then rocked back and forth to illustrate how out of plane the high spot is.
The fallacy in the intent of the rocking test is the assumption that such a surface should be perfectly even in any given four feet. Given standard manufacturing tolerances, installed wallboard is going to have some variation in its surface; thus, no one can reasonably expect that a hand-finished surface is likely to be perfectly even.
Nonetheless, once one seam or joint fails the rocking test, the rest of the seams on the job get looked at more closely, too. Often the person doing the inspecting uses a high wattage lamp that illuminates the minutest of surface variations. Before long, every imperfection in the finished surface has been detected, and the project stalls until the imperfections have been addressed to the satisfaction of whomever is empowered to approve the work.

The continuous manufacturing process for gypsum wallboard creates uniformity up and down the length of a sheet of board. Manufacturing tolerances established in ASTM C 1396, Standard Specification for Gypsum Board, limit localized variations in the thickness of gypsum wallboard, for example, to 0.03 inch. That’s the approximate equivalent of two stacked business cards and not a variation that is discernable to the naked eye.
The most common cause of gypsum board shoulders is irregularities in the framing that the gypsum board is attached to, particularly where two boards meet. If a stud where two board edges abut is twisted or otherwise out of alignment, the edges of the two boards will not line up perfectly; one edge or shoulder will be noticeably higher than the other. If the finisher does not either insist that the misalignment be fixed or take corrective steps to accommodate the misalignment, the job stands to come under severe scrutiny.
Ideally, the installer and/or the finisher (best if they are the same outfit) will inspect the framing before the wallboard is installed to ensure that the plane of framing is free of twisted, misaligned, or otherwise out-of-plane framing. They should also look for protrusions from screws, bracing, and electrical or mechanical components that could force the surface of the wallboard to go out of its intended plane. Otherwise, the finisher is likely to spend considerable time and effort trying to correct problems that could have easily been prevented.
Once the wall is closed in, it can be difficult to verify the source of the rock in the straight edge. One common analysis method requires destructive testing of the surface in question by switching board samples across the joint where the problem exists. To perform the test, a small rectangular sample is cut from the boards that cross the joint, reversed, reinstalled, and then rechecked with a straight edge to see if the rocking is consistent. Likely, when the sample is inverted, the part that was on the high side will now be below or on the plane of the surface of the board and will confirm that the board was manufactured correctly and that the likely culprit is misaligned framing.

Ridging can also result when the two edges of adjoining boards are compressed together as the lumber used for the framing seasons. New lumber may have a moisture content as high as 19 percent and still be considered acceptable. Once the heating and air conditioning in the structure go into service, the lumber’s moisture content can be significantly reduced, which results in shrinkage of the lumber, which in turn results in compression of the joints and a ridge along the joint. A third, but less common cause for joint ridging is the use of one board with a tapered edge abutting another board without a tapered edge. Again, as the joint treatment compound dries over this joint, a ridge emerges.
Fortunately, the repair for these last two conditions is fairly simple: Carefully sand down the high spot along the ridge without sanding through the joint tape. Apply joint treatment along the ridge and allow it to thoroughly dry. Sand smooth. Repeat as necessary and feather out each coat to ensure that a hump does not develop.
Gypsum wallboard walls and ceilings are hand-finished surfaces. Some variation in those surfaces is unavoidable. However, careful inspection of the framing over which the wallboard is attached, careful attachment to the framing by the installer, and careful attention to detail by the finisher will produce a finished product that is much less likely to be subjected to the strictest scrutiny.
decorating products mask surface irregularities, and sometimes the decorating products (e.g., glossy paint or reflective wall coverings) can accentuate those irregularities.
Often, a wallboard job will be specified before the final decoration is known, and instead of calling for the most all-encompassing level of finish (a Level 5 gypsum board finish), the specifications will call for the next step down (a Level 4 gypsum board finish). Wallboard finishers who conclude that a specification for a lower level of gypsum board finish indicates that the decorating material will mask surface irregularities can be in for a severe and expensive lesson.
Bent steel studs result in misaligned joints, which create shoulders.
DON'T HIDE A PROBLEM
One of the problems that occasionally arises on a wallboard job is the emergence of “shoulders.” Shoulders are typically defined as raised areas that occur at the edge of the taper on a sheet of gypsum board, usually about four inches from the factory-wrapped edge of the board. They are usually first noticed when the finisher is applying joint compound and discovers that while wiping down the joint, the compound appears not only in the usual depression created for the tape and mud, but also on the other side of a high spot in the board. Unless the finisher takes the time to feather out the area around the high spot so that it does not attract the attention of an inspector, it may appear as a hump that is apparent under severe lighting conditions.A commonly used quick-and-dirty field test to check how significantly these humps protrude above the plane of the surface is to place the middle of a straight edge, typically a four-foot level, on the high spot of a dried-in joint. The straight edge is then rocked back and forth to illustrate how out of plane the high spot is.
The fallacy in the intent of the rocking test is the assumption that such a surface should be perfectly even in any given four feet. Given standard manufacturing tolerances, installed wallboard is going to have some variation in its surface; thus, no one can reasonably expect that a hand-finished surface is likely to be perfectly even.
Nonetheless, once one seam or joint fails the rocking test, the rest of the seams on the job get looked at more closely, too. Often the person doing the inspecting uses a high wattage lamp that illuminates the minutest of surface variations. Before long, every imperfection in the finished surface has been detected, and the project stalls until the imperfections have been addressed to the satisfaction of whomever is empowered to approve the work.
Typical Joint After Ridging
WHO'S TO BLAME?
When faced with this predicament, wallboard finishers often assert that the board was manufactured incorrectly. Such is rarely the instance. Gypsum board is manufactured to strict tolerances by machines that are regularly calibrated to ensure that the product meets all required specifications. Any material that does not meet these specifications is taken out of the production line.The continuous manufacturing process for gypsum wallboard creates uniformity up and down the length of a sheet of board. Manufacturing tolerances established in ASTM C 1396, Standard Specification for Gypsum Board, limit localized variations in the thickness of gypsum wallboard, for example, to 0.03 inch. That’s the approximate equivalent of two stacked business cards and not a variation that is discernable to the naked eye.
The most common cause of gypsum board shoulders is irregularities in the framing that the gypsum board is attached to, particularly where two boards meet. If a stud where two board edges abut is twisted or otherwise out of alignment, the edges of the two boards will not line up perfectly; one edge or shoulder will be noticeably higher than the other. If the finisher does not either insist that the misalignment be fixed or take corrective steps to accommodate the misalignment, the job stands to come under severe scrutiny.
Ideally, the installer and/or the finisher (best if they are the same outfit) will inspect the framing before the wallboard is installed to ensure that the plane of framing is free of twisted, misaligned, or otherwise out-of-plane framing. They should also look for protrusions from screws, bracing, and electrical or mechanical components that could force the surface of the wallboard to go out of its intended plane. Otherwise, the finisher is likely to spend considerable time and effort trying to correct problems that could have easily been prevented.
Once the wall is closed in, it can be difficult to verify the source of the rock in the straight edge. One common analysis method requires destructive testing of the surface in question by switching board samples across the joint where the problem exists. To perform the test, a small rectangular sample is cut from the boards that cross the joint, reversed, reinstalled, and then rechecked with a straight edge to see if the rocking is consistent. Likely, when the sample is inverted, the part that was on the high side will now be below or on the plane of the surface of the board and will confirm that the board was manufactured correctly and that the likely culprit is misaligned framing.
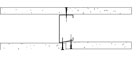
Typical Ridging at Taper-to-Butt Joint
UP ON THE RIDGE
Another similar problem that finishers face is joint ridging. Instead of a hump along a joint or seam, a ridge is a fairly discreet line that emerges along the length of a joint. There are several possible causes for a joint ridge. Similar to the primary cause of shoulders, twisted framing can result in the edge of one board protruding slightly higher than that of the abutting board. Once the joint treatment dries, the ridge becomes more obvious. So, a careful inspection of the framing prior to the installation will not only help avoid shoulders, but ridging as well.Ridging can also result when the two edges of adjoining boards are compressed together as the lumber used for the framing seasons. New lumber may have a moisture content as high as 19 percent and still be considered acceptable. Once the heating and air conditioning in the structure go into service, the lumber’s moisture content can be significantly reduced, which results in shrinkage of the lumber, which in turn results in compression of the joints and a ridge along the joint. A third, but less common cause for joint ridging is the use of one board with a tapered edge abutting another board without a tapered edge. Again, as the joint treatment compound dries over this joint, a ridge emerges.
Fortunately, the repair for these last two conditions is fairly simple: Carefully sand down the high spot along the ridge without sanding through the joint tape. Apply joint treatment along the ridge and allow it to thoroughly dry. Sand smooth. Repeat as necessary and feather out each coat to ensure that a hump does not develop.
Gypsum wallboard walls and ceilings are hand-finished surfaces. Some variation in those surfaces is unavoidable. However, careful inspection of the framing over which the wallboard is attached, careful attachment to the framing by the installer, and careful attention to detail by the finisher will produce a finished product that is much less likely to be subjected to the strictest scrutiny.
Looking for a reprint of this article?
From high-res PDFs to custom plaques, order your copy today!


