Bumping Off the Walls
In commercial drywall construction, a flat is a flat when it’s flat. Why then do we see so many humps in commercial “stand-up” drywall construction? There are many reasons, but here are some of the more popular that we’ve encountered.
Unfortunately, even the most perfectionist journeymen are sometimes forced to compromise in order to make a living. A road is sometimes chosen somewhere between quality, safety and making a profit. In almost every instance, a competitive job budget will not allow an artisan to achieve all three.
Another unfortunate variable is the interaction of trades within the metal stud and drywall industry, meaning one trade will have an effect on the next, either by helping or inhibiting quality and the production.
Humped stand-up joints
The most common variable aspects of humped stand-up joints are framing layout and the application of drywall. The two, unlike with wood framing, are almost interconnected. In order to understand what causes the hump, one must take a closer look at the stud.A wood stud is rectangular in shape, a four-sided box with two opposing sides of equal measures. The metal stud tries to imitate the wooden stud, but to gain cost effectiveness linear strength is lost. Metal-stud framing utilizes a system to gain the strength that wood studs have inherently. Metal, especially the lighter-gauge studs, are subject to racking, movement or bowing if the time is not taken by the rockers to create a plum or linear plane where each opposing sheet bisects the stud. Also, corners are not tri-framed; sliders or lockers are used to secure a 90-degree corner.
When encountering a partition, wall joints should be staggered, preferably by 24 inches. This means that the factory joints on each side of the wall never fall on the same stud.
The following steps outline the fundamentals of applying drywall to metal-stud framing.
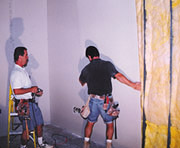
Establish the direction of the layout and apply drywall only in that direction (photo 1). The stud is U shaped, or open to one side. The open side is referred to as the “soft side.” The direction of layout goes from soft side to hard side.
Locking corners should also be considered. An example is if one wall runs behind another, the slider or locker is secured to the bypassing wallboard. By attaching the sheet to a locked corner sheet, movement can be prevented.
A screw is fastened to the stationary track to further prevent movement of the sheet (photo 2).
A screw is placed in the “stand-up” joint next to the previous sheet (photo 3).
When screwing in the field, you have two choices in order to maintain plumb studs. Either A) start by pulling exposed stud at top of sheet to 16 inches or 24 inches layout and screw from the top downward, or B) start from the bottom up, screwing in small, precise increments and visually sight the layout as you screw upward. In order to prevent further racking of field stud, I’ve found the best method is to physically hold the field stud in place by going to the back of the sheet and holding it in position while your partner places the first few screws.
The final and most critical step before installing the next sheet is to push or pull the final stud of the sheet into position in order to maintain an equal screwing surface for each opposing sheet (photo 4). Use the factory edge of the sheet as a guideline. To keep the stud plumb, keep the number of screws to a minimum until the next sheet is attached, thus the soft side of the stud gives way to the more rigid “hard” side of the stud, thus preventing an uneven joint.
Putting Humpty together again
Where some tapers take the easier and more rapid way of finishing the unseen joint is by “humping on the flat.” Remember that you must cover the tape. On the assumption that the metal studs are straight and undamaged, Sliptrack can be installed on the non-load-bearing walls where needed to prevent stud bowing as a result of excessive weight from the above floor or roof. Any unsightly humps may be a direct result of improper finishing or taping of the commercial drywall joint.Is a great taping job measured by the amount of years a mechanic or journeyman has under his belt or by the finished product itself? Remember one thing: Drywall is nothing more than a cost-effective alternative to plaster. And although skim coating walls may work to hide the transition between the finished taping job and the face paper of the drywall itself, it does not hide the hump created on the flat by the taper who needs to reassess his own work.
No amount of texture, heavy industrial-grade wallpaper or flat paint will banish the problem. A properly finished drywall joint starts at the foundation of the taping process: the first coat. The most crucial part of the first coat or taping the joint is wiping out enough mud from behind the tape so that it gets inside the tapered edge and below the surface of the face of the wallboard. Without doing this correctly, the tape will dry at the surface face of the wallboard and then the only way to cover the tape at this point is to hump it on.
When drywall is properly applied to metal stud, there is no excuse for the humping of the flats. Even the occasional uneven joint can be corrected by a finisher who takes pride in his work.
Overall, most tradesman do take pride in their work and, hopefully, these suggestions will help others to achieve a higher standard of quality.
Looking for a reprint of this article?
From high-res PDFs to custom plaques, order your copy today!


