Fire Stone
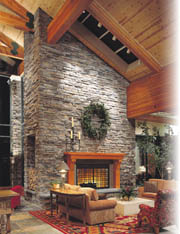
The entire project can take as little as two days to complete. A fireplace using a manufactured stone veneer is far more cost-effective than using full thickness natural stone. Because it's a lightweight veneer, manufactured stone veneer requires no additional footings or wall ties. This gives contractors unlimited flexibility in the design and location of the fireplace, even in places where full-thickness natural stone shouldn't work.
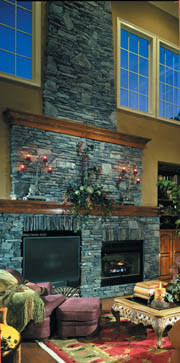
Contractors may choose matching or complementary hearthstones for a finished look and added practicality. Veneers are available in a wide variety of textures and colors. Homeowners or clients can choose from catalogs, online or go directly to dealers for help in finding the perfect stone to complement their design. Add-ons, such as architectural trim products, complete the look.
Romancing the stone
Keep in mind the style of the home and the feeling the homeowner is trying to create when assisting a client in choosing stone. The size of the room should influence selection. Large-scale textures may be better suited to larger rooms. Remember that light colors can create an illusion of greater size and dark colors can minimize.Measure the project area's length by its height to determine the square feet of stone needed. Subtract the square footage of the fireplace opening. Measure the linear feet of outside corners to determine the number of corner pieces needed. One linear foot of corner stone covers approximately 3/4-square foot of surface.
Here is a list of tools and materials required for the project:
- Wheelbarrow and hoe to mix the mortar
- Spray bottle
- Safety glasses and dust mask
- Whisk broom for cleaning the finished work
- Mortar
- Table or circular saw and a hatchet or wide mouth nippers for cutting stones
- Masonry blade for the saw
- Grout bag
- Hawk and trowel to work with the mortar
- Metal jointing or striking tool
Depending on the particular installation, some of the following materials may be needed:
- Metal lath
- Breather-type building paper
- Hammer or staple gun for applying building paper and/or metal lath
- Roofing nails for nailing lath to the substrate
Preparation
If the fireplace is unpainted brick, mortar can be directly laid over it. If painted, metal lath must be attached first. If there is a plywood surround, a layer of breather-type building paper must be applied on top of the plywood. Because manufactured products are lightweight, additional footings or wall ties aren't needed. Always refer to complete installation instructions from the manufacturer. Before beginning installation, here are some helpful hints:
- Lay the stones out on the floor and decide on a desired arrangement before applying them to the wall.
- Use a large drop cloth to protect the work area from possible mortar droppings.
- Be prepared for dust. Cut the stones outside, away from the home's entrance. Remember to wear a dust mask and safety goggles when cutting or trimming stones.
- Place cut stones in a way that hides the cut edges.
- Match the mortar color to the stone color.
- When applying mortar, make sure it isn't too wet or too dry.
- Work from floor to ceiling.
- Install corner pieces first. Corner pieces have a long and a short leg. Alternate these on each level.
- Do not leave too much space between the stone pieces. (1/2 to 3/4 inch is recommended.)
- Make sure the whiskbroom used to rake out the excess mortar is dry.
Installation
- Run metal lath horizontally, starting at the bottom, with each sheet overlapping the one below it by at least 2 inches. Wrap and overlap all corners.
- At inside or outside corners, crease the sheet and wrap around the corners, overlapping a minimum of 16 inches or more to the adjacent wall.
- Apply a 1/2- to 3/4-inch thick layer of mortar over the lath. Begin at the corner and cover only a few square feet at a time, so you can place the stone into the mortar before it hardens.
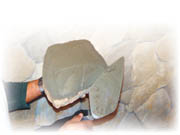
- Use a spray bottle to dampen the back of each stone and smear a 1/4- to 1/2-inch layer of mortar completely over the back of the stone.
- Press the stone into place so it is firmly seated in the mortar, allowing excess mortar to extrude into the joints.
- Fill the grout bag with mortar and fill the joints. Let the mortar harden 15 to 30 minutes. When it begins to get crumbly, rake out and consolidate the excess mortar, using a rounded stick or jointing tool.
- Keep mortar joint width to a minimum (1/2 to 3/4 inch is recommended). Some textures are tight fitting and require no joints. Refer to the manufacturer's installation instructions.
With the array of colors and textures available today in manufactured stone, and the ease of installation, a stone fireplace is a finishing touch that contractors can confidently offer their clients. Manufacturers, such as Owens-Corning's Cultured Stone, is an example of where contractors can look for products.
Looking for a reprint of this article?
From high-res PDFs to custom plaques, order your copy today!


