Plaster Man
Antipodean Notes
Now, many readers here in the United States may think of this country with recent movies in mind, such as "The Lord of the Rings" series and "Whale Rider," which were filmed in this part of the world. But plastering is alive and well here, too. This country is divided up into two beautiful islands, the North and the South, and I was recently able to get acquainted with a plasterer there, Brian Carr, from the South island. I was able to interview him a few weeks ago and so I wanted to include some of what we talked about.
One trowel to rule them all
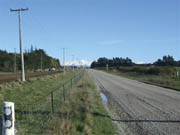
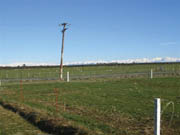
First though, I wanted to get you acquainted with this beautiful country! I included a few pictures that will give you an overview of what life's like there. In pictures #1 and #5, you would have to agree that this is an awesome place. The mountains and landscape really are breathtaking. I spoke with Carr in February.
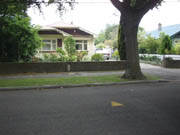
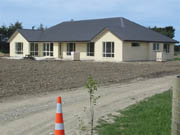
While the United States was enduring a cold winter, it was a hot summer in New Zealand. They're also about 12 hours ahead of the central time zone. Picture #2 shows a house that would be wood lath and three-coat plaster inside, which was done in a very similar way as it is here. Picture #3 shows a newer building going up. In picture #4, there's a view of a typical street in Christchurch.
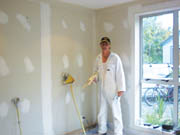
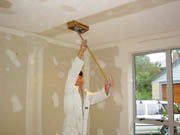
In pictures #6 and #7, Carr is working on taping out a newer house. In our discussion, I learned that his work is about 50 percent drywall taping and finishing, and the other half he does plaster repair and other types of plastering. I was curious to know what type of materials are used in New Zealand and it seems it's what we use here.
For repair work, he uses much what I use, a lime putty along with molding plaster, called "4ffff," a very smooth plaster of Paris that works really well. He gave me a Web site, www.troweltradessupacentre.co.nz. It's interesting how many American products are available on this site.

Great project results
Fibrous plaster has to do mainly with ornamental plastering but others, such as heated ceilings and wall and ceiling work, where the plaster is reinforced with fiberglass. He was helpful in giving me a few Web sites that show quite a few examples of what this type of plaster is all about. Though this company is no longer in business, take a look at www.plastercraft.co.nz. Especially impressive and awesome are the "barrel ceilings." Then take a look at www.seddonsfibrousplaster.co.nz. This is a plastering company that offers cornices, corbels, wall niches and coffered ceilings, to name just a few.
Just as in the United States, I believe there is some good money to be made in plastering in this country. Especially is this the case in repair and restoration work. (In picture #8, Carr has the right idea: He's "taking it to the bank"!)
I talked with the folks there and they unfortunately didn't have any pictures of the actual work that went on during construction but some pictures can be seen of the rooms and other locations at this establishment. Notice in particular the fine ornamental work done in the rooms that are pictured in the "gallery" section of the site. A great deal of this work was done by Carr over a six-month period that he worked on this project.
I hope the visit to New Zealand was enjoyed. In upcoming articles, we'll visit with some plasterers who've been in the field for many years here in the United States. I'm sure the readers will find their insights into the trade interesting. And if any plasterers want to be interviewed, contact me and we'll set it up.
Robin is a 20-year veteran of the plastering trade and has produced a series of videos on the subject. Write to the Plaster Man c/o NJM, Walls & Ceilings, 2401 W. Big Beaver, Suite 700, Troy, Mich. 48084.
Sidebar
Dear Plaster Man,I would like to know the best way to tape combed angles (i.e., from a vertical wall to a 45-degree ceiling). I can do it but sometimes it seems hard to get a uniform line. Could you tell me the right tapes to use and the best technique. This is for taping not plastering.
Kenneth , Ames Taping, Scotland
Whether plastering or taping, the challenge is the same with getting these angles right. I come in on a lot of projects and find that the workers have followed the board and the line is really crooked and weaves quite a bit. To remedy this, I would suggest the following: Use a control bead set to a chalk line. It makes a straight line that is practically crack proof. This type of product works well with plaster or drywall finishing.
One company that makes such a product is manufactured by the Trim-Tex. This product comes in 150-foot rolls. I've met plasterers who really like using this. They put it in all splayed angles for vaulted ceilings and also where rooms have knee walls. This treatment gives one a finished angle that's straight as an arrow-and also prevents cracks from developing in the angle-both great benefits.
Looking for a reprint of this article?
From high-res PDFs to custom plaques, order your copy today!


