Walls & Ceilings logo
search
cart
facebook twitter linkedin youtube youtube Spotify Podcasts Apple Podcasts Spotify Podcasts Apple Podcasts
  • Sign In
  • Create Account
  • Sign Out
  • My Account
Walls & Ceilings logo
  • NEWS
  • TOPICS
    • Drywall
    • Stucco/EIFS
    • Ceilings
    • Steel Framing
    • Fireproofing
    • Interior Plaster
    • Building Envelope
    • Insulation
    • Technology
    • Interior
    • Exterior
    • Women In Construction
  • COLUMNS
    • Up Front
    • All Things Gypsum
    • Art & Craft of Plastering
    • Stucco Stop
    • Steel Deal
    • Industry Voices
  • PRODUCTS
    • Buzz Guide
  • EVENTS
    • Industry Events
    • Webinars
    • BUILD Expo
  • MEDIA
    • Videos
    • Podcasts
    • Photo Galleries
    • BUILD26 Videos
    • Take our Quiz!
    • Infographics
  • EXCLUSIVE
    • Newsletters
    • Top 50 Contractors
    • Contractor of the Year
    • State of the Industry
    • W&C Store
    • Market Research
    • CEUs
    • Sponsor Insights
    • Custom Content & Marketing Services
  • DIRECTORY
  • EMAGAZINE
    • eMagazine
    • Advertise
    • Archive Issues
  • SIGN UP!
DrywallInterior Plaster

Resurfacing Old or Damaged Walls and Ceilings

By Myron Ferguson
resurfacing plaster
Old plaster with washers installed.
plaster cracking
Larger cracks V-grooved and washers installed.
resurface roller
Using a paint roller to apply the compound to prep for embedding the FibaFuse product.
plaster mesh
Cracks and loose plaster repaired with washers and mesh tape. Next step is to prefill and blend with a setting compound.
refasteners
Plaster wall refastened with major cracks repaired and a setting compound applied to blend in uneven surfaces.
Fibafuse
Close-up of FibaFuse showing it is a porous matt.
Fibafuse
Roll of FibaFuse being measured to cut to height of the wall.
finishing
Repaired wall having a finished plaster applied (American Clay product).
finishing
Embedding the matt into the joint compound with a taping knife.
finishing
Second piece of FibaFuse being positioned. Edges are butted.
resurfacing plaster
plaster cracking
resurface roller
plaster mesh
refasteners
Fibafuse
Fibafuse
finishing
finishing
finishing
June 1, 2016

I know there are some people in my area of work that still do plaster work, but I don’t personally know any. It was not long after I became established as a quality drywall finishing company that I started to get calls for plaster repairs and resurfacing. I live in Saratoga County, N.Y. where there are a lot of older homes that have lath and plaster walls and ceilings. The last thing the homeowners wanted was plaster replaced with drywall—and I agree. I have never liked the idea of covering old plaster with a layer of drywall, and I certainly didn’t want to remove all that dusty old plaster, especially with the lead paint laws enforced today. So, plaster repairs and resurfacing was the only viable answer.

At first I tried applying basecoat and finish coat plaster and became quite good at this. It is interesting that not long after I purchased a couple bags of plaster from my supplier that I started getting more calls for plaster work. But I was looking for something easier and less expensive that I could offer my customers. After all, we were a drywall finishing company, not a plastering company.

I actually was out in the warehouse of the company that makes FibaFuse drywall tape about five years ago. We were shooting a how-to video on the drywall tape when I noticed a 3-foot-wide roll of the product. I don’t know why it was there but I grabbed the roll and troweled some compound on a wall and easily embedded the material. The Fibafuse material is a fiberglass matt—not a weave—and because the fibers are not particularly dense, it is quite porous. It is very easy to embed in joint compound, which is the adhesive that holds the material in place.

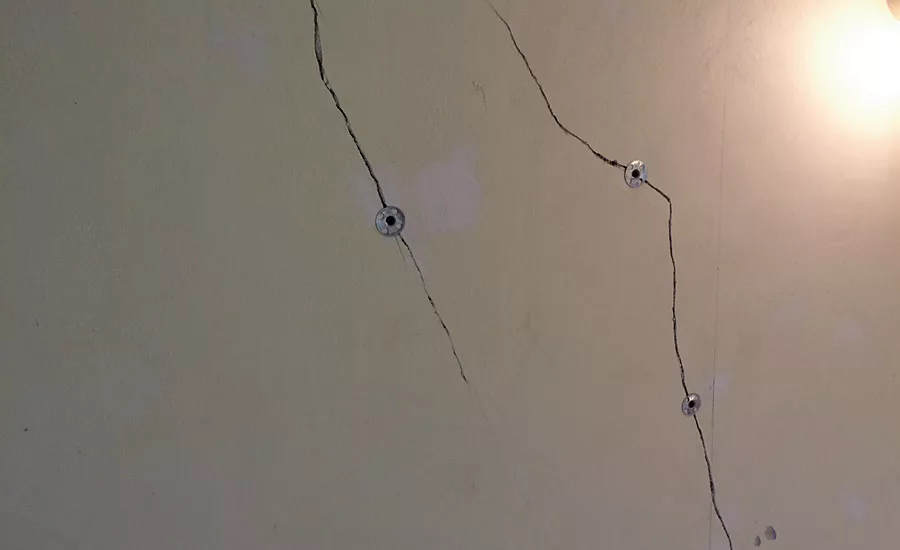
A lot of the old plaster has surface cracks over much of the surface, and it is very time consuming to apply tape over each crack, even when using self-adhesive mesh tape. Then, all these taped areas have to be concealed with multiple layers of compound. This is before the spider cracks are even considered. Spider cracks are what I call the fine cracks that are sometimes all over the surface. These spider cracks appear to just be cracks in the paint surface, but I was never sure what to do about them. Was it necessary to reinforce each of these cracks? Reinforcing all these cracks was difficult and time consuming. This process required a lot of mesh tape and was a slow process.

I started using the FibaFuse Wall Reinforcement because I can now cover the entire surface and it is simply embedded in joint compound. The surface becomes quite smooth during the embedding process. This is not true when taping and patching. I did try the wide roll of self-adhesive mesh and had good results but I actually prefer the fiberglass matt because I think it is faster and makes it easier to achieve the results I am looking for.

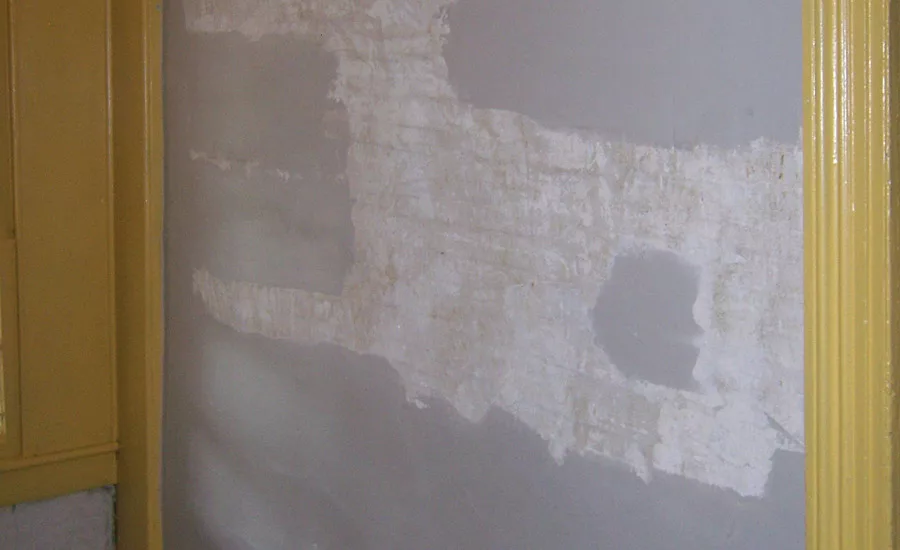
 This fiberglass matt wall reinforcement was just what I was looking for because it is great for old or damaged plaster walls and ceilings, for drywall damaged when wallpaper was removed, textured surfaces and above grade block walls, or any surface where removing existing material or adding a substantial thickness is not desirable. I can resurface without adding significant thickness, typically less than 2 millimeters, while covering all cracks and imperfections.

The fiberglass matt actually fuses with the compound so it is very strong and the surface is quite smooth as soon as embedded. The material and process I outline below is an inexpensive and simple solution for wall and ceiling re-surfacing.

Prep

Whenever finishing over an existing surface, that existing surface is the base so if it is in poor condition, any material applied over it will be compromised. So if the base is loose, dirty, too absorbent, offers poor adhesion, etc., the new surface may not create the stable durable finish desired.

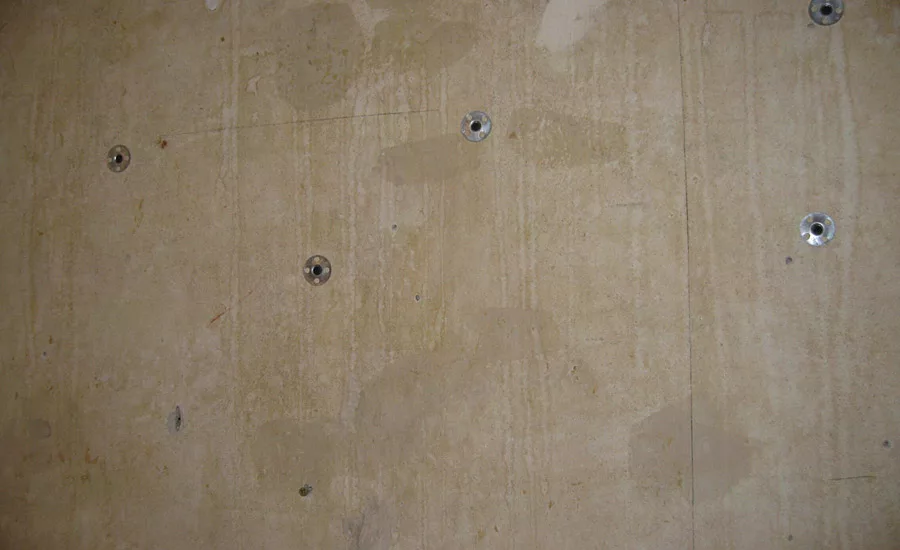
I start out by prepping the existing surface. Remove loose plaster or paint and contaminated materials. Often loose plaster areas can be pulled back tight by using plaster washers. If the surface is very smooth, rough it up with a coarse grit paper, 80-grit or coarser. I have used paint de-glossers when the paint is glossy with success. Using a plaster bonding agent, such as Plaster Weld is also a great idea.

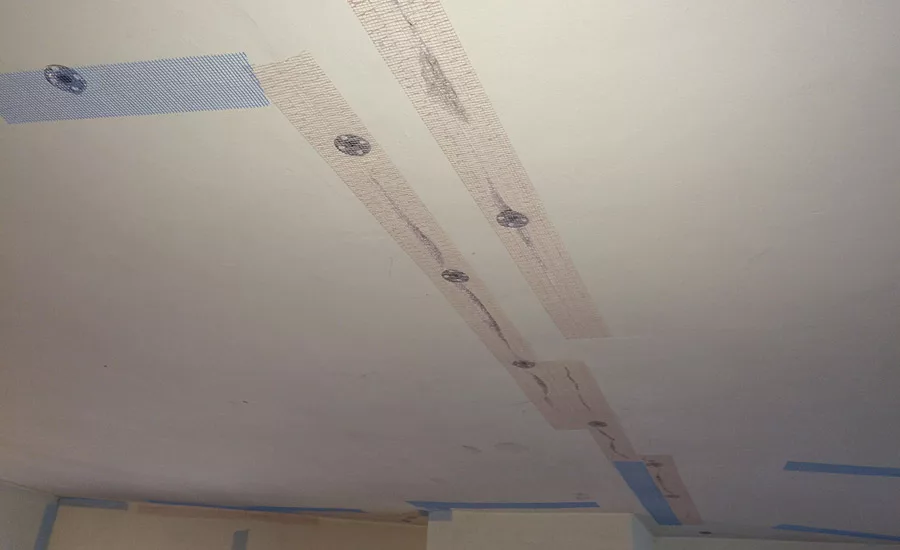
I suggest V-grooving larger cracks and filling with setting compound and covering with extra strength fiberglass mesh tape. Areas that are recessed or crowned should be filled or feathered out at this time with a setting compound. Using the setting compound allows me to complete the prep work and move right on to embedding the glass matt.

Tip: Prior to starting the job, I suggest prepping a test area to make sure that the method you are thinking of using is going to work. This way, when you start the work, you can feel confident that you will have good adhesion.

Process

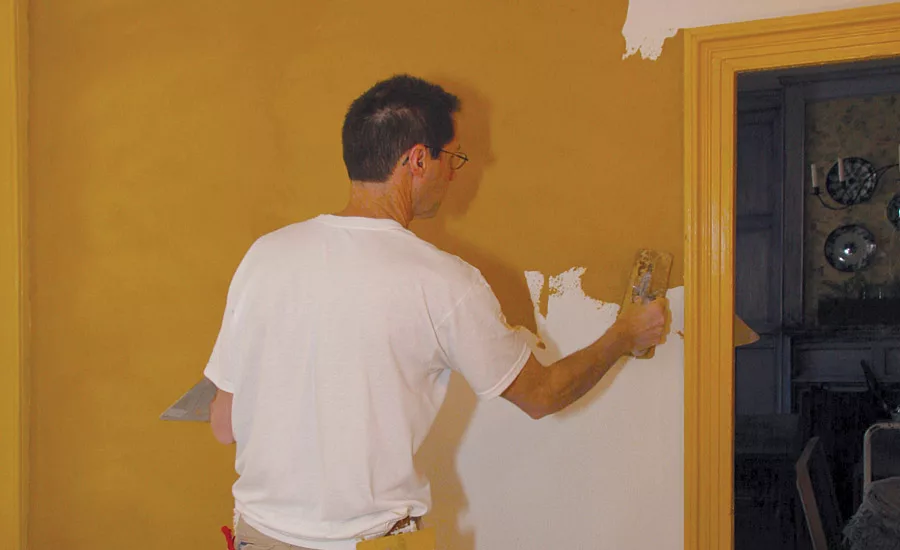
Apply joint compound (the adhesive) with a paint roller with a 1/2-inch nap cover (my preferred method), could also be applied with a wide taping knife or even a paint sprayer capable of spraying joint compound. The compound thickness should be about 1/8-inch thick. Edges close to walls and ceilings can be coated by applying the compound with a paint brush or taping knife.

I suggest using a heavy-weight all-purpose compound and not the lighter-weight compounds because of its greater strength and adhesion qualities.

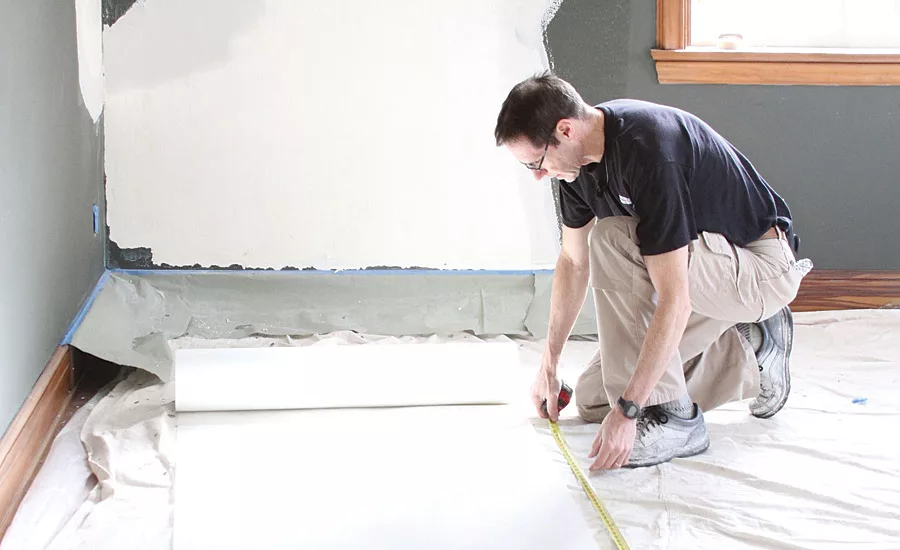
Embed in similar fashion as when hanging wallpaper. Typically the wall reinforcement would be hung vertical on a wall and as one length. Similarly, a ceiling could be hung in one piece also as long as it was manageable. Position the first piece of wall reinforcement along a straight corner, leveled line or chalked line and press into compound with wide taping knife working from the center toward edges. Excess material along edges and around cased openings is cut off with a taping knife. The fiberglass matt cuts easily so no need to use a sharp knife. Continue to embed tightly with the taping knife until smooth and compound is forced through the face.

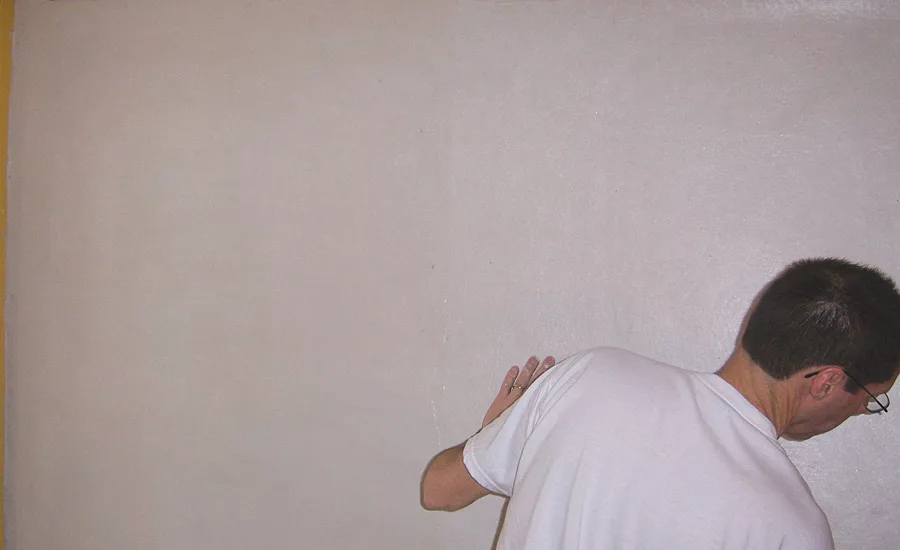
Apply a second coat of joint compound within a few minutes of embedding by rolling more of the same compound firmly into the surface. This process fills any voids in the surface and any dry areas behind the fiberglass matt. Immediately smooth and remove this layer of compound with a wide taping knife leaving just a thin coat of compound over the surface.

Each abutting piece of the fiberglass matt is just butted to the prior piece, similar to hanging wallpaper. This method is preferred but edges can be lapped if necessary. Because the matt is relatively thin it can just be left as a double layer or double cut as when wallpapering. Double cutting means cutting through both layers with a utility knife and then removing the narrow strips leaving tight fitting butted edges.       

When thoroughly dry, lightly sand with fine sandpaper (220 grit). Note: It will most likely take more than 24 hours for the compound to be thoroughly dry.

Then roll on more joint compound (a light weight compound can be used for this application). Remove and smooth with a wide taping knife leaving the surface smooth and tight. This process is similar to applying a Level 5 finish and in most cases no additional sanding is needed.

KEYWORDS: fiberglass finishing repair restoration

Share This Story

Looking for a reprint of this article?
From high-res PDFs to custom plaques, order your copy today!

Wc1219 ft be a contractor p8 author myron ferguson
Myron Ferguson is a drywall contractor and trainer from Galway N.Y. He is the author of "Drywall: Professional Techniques for Great Results" and has a series of instructional DVDs. To contact him, visit www.thatdrywallguy.com.

Recommended Content

JOIN TODAY
To unlock your recommendations.

Already have an account? Sign In

  • Abercrombie & Fitch

    EIFS in 2026: How Specialty Finishes Are Redefining Exterior Wall Systems

    As building codes, owner expectations, and design demands...
    Stucco/EIFS
    By: Regi Mendoza
  • proper air and vapor control

    From Energy Efficiency to Moisture Management: Why Air and Vapor Control Matter

    How proper air and vapor control within building...
    Building Envelope
    By: Benjamin Meyer AIA, LEED AP
  • Linear Metal Ceiling Beam Baffles

    Top 25 Ceiling Contractors of 2026

    Suspended ceilings demand precision, code compliance and...
    Ceilings
    By: John Wyatt and Tanja Kern
You must login or register in order to post a comment.

Report Abusive Comment

Manage My Account
  • eMagazine Subscription
  • Newsletters
  • Online Registration
  • Manage My Preferences
  • Subscription Customer Service

More Videos

Sponsored Content

Sponsored Content is a special paid section where industry companies provide high quality, objective, non-commercial content around topics of interest to the Walls & Ceilings audience. All Sponsored Content is supplied by the advertising company and any opinions expressed in this article are those of the author and not necessarily reflect the views of Walls & Ceilings or its parent company, BNP Media. Interested in participating in our Sponsored Content section? Contact your local rep!

close
  • medical professionals moving a patient on a stretcher through the halls of a medical building
    Sponsored byNational Gypsum Company

    What Does High Performance Mean When It Comes To Gypsum Boards?

Popular Stories

Linear Metal Ceiling Beam Baffles

Top 25 Ceiling Contractors of 2026

Wichita Biomedical Campus

Wichita Drywall Worker Dies After Scaffolding Fall

QXO Just Changed the Game-Here's What Contractors Are Asking

QXO Just Changed the Game-Here's What Contractors Are Asking

An interior drywalling work in progress

Boost Profits with AI Scheduling

Events

June 24, 2026

The Bright Side & Benefits of Designing with Integrated Lighting

Credits 1 AIA LU/HSW; 0.1 ICC CEU

This course will explore the pivotal role architects and lighting design play in creating safer, more sustainable spaces. Learn how to avoid common lighting mistakes and make informed decisions that create the best visual environment for occupants. 

January 1, 2030

Webinar Sponsorship Information

For webinar sponsorship information, visit www.bnpevents.com/webinars or email webinars@bnpmedia.com.

See our full library of webinars

View All Submit An Event

Products

2026 National Painting Cost Estimator

2026 National Painting Cost Estimator

See More Products

Related Articles

  • walls & ceilings contractor

    What it Means to be a Walls & Ceilings Contractor

    See More
  • The Secret to Great Looking Walls & Ceilings

    See More
  • Arms crossed building engineer and thinking construction worker woman with smile goals or real estate architecture vision happy development employee engineering or helmet on property working site

    Walls & Ceilings Introduces "Women Who Build": Elevating the Leaders Shaping the Future of Walls and Ceilings

    See More

Related Products

See More Products
  • Drywall: Professional Techniques for Great Results, 4th Edition

See More Products

Events

View AllSubmit An Event
  • December 10, 2025

    Next-Level Drywall Corners: Live Demo of Precision Grooving Techniques

    On-Demand This webinar will feature a live demonstration that showcases an innovative approach to creating clean, accurate drywall corners using portable grooving technology.
View AllSubmit An Event

Related Directories

  • Wall and Ceiling Alliance (WACA)

    The Wall And Ceiling Alliance (WACA) is an association that promotes and advocates for the interest of the wall and ceiling industry and the welfare of its membership. WACA is dedicated to the development and promotion of its membership. We support our community by providing vital resources that grow our trade, grow membership on a professional level and grow our overall industry. The Wall and Ceiling Bureau (WCB) is WACA's technical partner.
×

Connect with the industry’s leading resource for unparalleled insights and education.

Join thousands of industry professionals today. Shouldn’t you know what they know?

JOIN NOW
  • RESOURCES
    • Advertise
    • Contact Us
    • Directories
    • Store
    • Want More
  • SIGN UP TODAY
    • Create Account
    • eMagazine
    • Newsletters
    • Customer Service
    • Manage Preferences
  • SERVICES
    • Marketing Services
    • Reprints
    • Market Research
    • List Rental
    • Survey/Respondent Access
  • STAY CONNECTED
    • LinkedIn
    • Facebook
    • Instagram
    • YouTube
    • X
  • PRIVACY
    • PRIVACY POLICY
    • TERMS & CONDITIONS
    • DO NOT SELL MY PERSONAL INFORMATION
    • PRIVACY REQUEST
    • ACCESSIBILITY

Copyright ©2026. All Rights Reserved BNP Media, Inc. and BNP Media II, LLC.

Design, CMS, Hosting & Web Development :: ePublishing