Exploring the Beauty of Stucco and EIFS
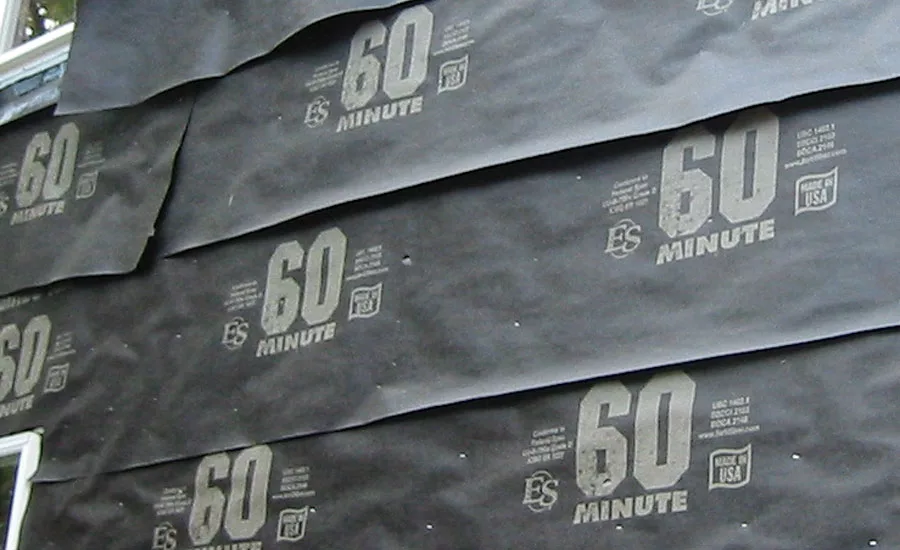
Code compliant WRB; not pretty but properly done.
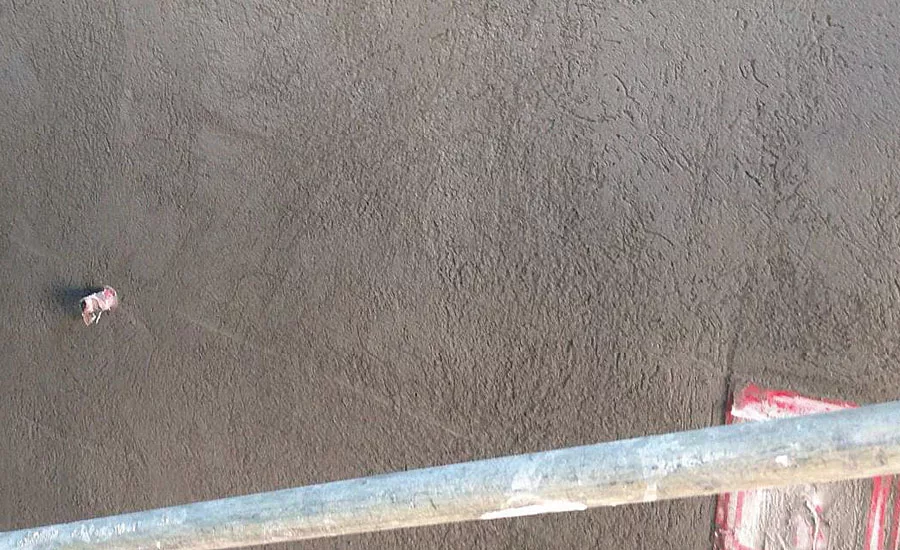
An example of mesh-ghosting in an EIFS basecoat.
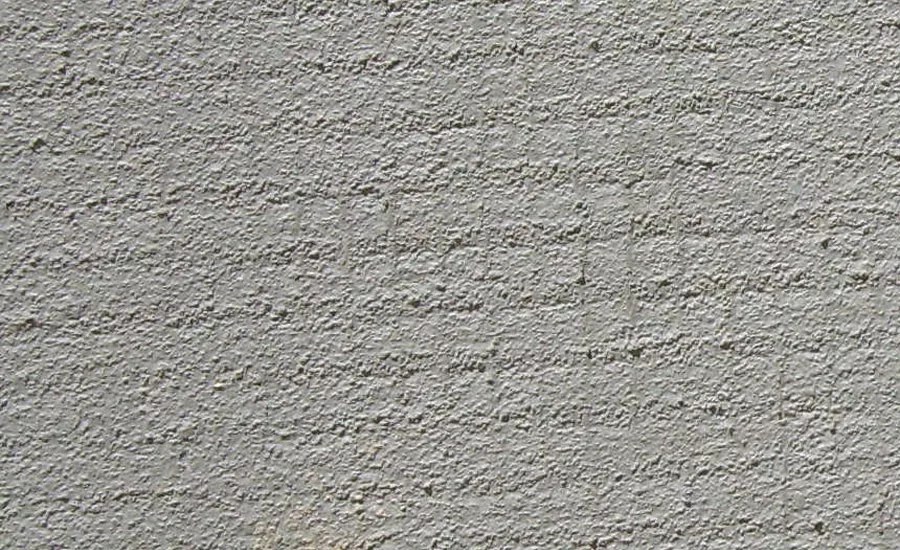
Varying surface conditions in a properly floated stucco brown coat.
They say beauty is in the eye of the beholder. In our stucco and EIFS environment, this rings true when looking at the finished product, sometimes its beauty to one and less than beauty to another. But aesthetics aside, does a beautiful job mean it is a sound job, one that will stand the test of time? Do blemishes, bumps and lines mean the job wasn’t done to specs? My fellow beholders, open your eyes while we explore the “beauty” of stucco and EIFS.
Every project has a starting place and for our stucco and EIFS installers, that is the substrate. The first thing all applicators should do, before installing anything, is to check out the substrate conditions (I am not advocating the substrate be beautiful but it should be in plane and compliant with the code requirements). With either cladding, if you start out crooked or out of plane, there’s an increased likelihood you are going to end up crooked or out of plane. Further, with new liquid applied WRBs, it is even more important that the surface be flat and without a lot of planar irregularities. For those more adept at fixing the sins of others, straightening out the crookedness, the “fix” has added costs and if those costs weren’t adjusted for, then your bottom line just got a little smaller.
Yes, Beauty Has a Price
So let’s say your substrate is Marilynn Monroe perfect and you are ready to lath or put up foam. In stucco applications, the WRB should be installed with some sort of decorum. If it is paper, a proper and consistent overlap, with the sheets
rolled out in a level orientation, is expected. Large tears that were patched and mismatched starts and stops may be code compliant but can lead to issues when installing the wire lath. A mismatch of lines and laps created by the “quilting” of the WRB tends to throw off the eye and one can miss a stud—or twelve—with the fasteners. It follows to say the wire and trims should be straight and level as well. If things are a bit awry, it doesn’t necessarily mean the lath was installed wrong. A trained eye can spot any deficiencies.
In EIF systems, the next step is the WRB and foam (a barrier EIFS doesn’t use the WRB and is a great system but that is another topic for another time). The foam of an EIF system should start out in a level orientation with each end abutted tightly. If you get the first course right, the rest will follow easily. It is imperative that the foam boards be abutted tightly to one another with no gaps. If a gap does appear, shim it with a sliver of foam, always.
Back in my applicator days, we would try to adhere the boards to the substrate, adjusting through wiggling and tamping, to leave the surface in a true plane, ergo less rasping. My clever brother figured out a way to use duplex nails to ensure a nice level surface. He called it “porcupining.” He would place the boards, give them a wiggle and tamp, then use nails to pin the corners of the board to the next board. By adjusting the angle and depth of each nail, he could pin the boards to each other so once the adhesive dried, the very surface would be in plane with the adjacent board, providing less rasping. Caveat: never pin the boards to the substrate by piercing the substrate with the nail. The nail should only be piercing foam.
And so we have it, WRB, lath and trims installed, check. EPS foam adhered and abutted tightly and rasped to a true plane, check. Now it is time to apply the base coats, scratch and brown for stucco, basecoat and mesh for EIFS.
Beauty Just Got a Little More Expensive
Now that the lath is true and flat and the trims are in place, the applicator has to simply fill in and screed the cement. When there is a lot of “fixing” of the plane at this stage, the stucco has to be applied to varying thickness. For the most part a slight thickness variation of the stucco base coat is expected just by the sheer nature of differing component thicknesses. It is when one has to fill in, or feather around variances in the plane that stucco issues can arise. A very thick area next to a relatively thin area will most likely crack due to the differentiation of movement between the varying mass of thickness. It doesn’t mean the applicator installed the stucco wrong, rather it points to an unacceptable tolerance in plane at the substrate level. An acceptable, properly finished surface of a brown coat will vary in appearance.
As part of the process, the applicators may have to back-scrape the brown coat. This is where the brown coat has dried to a state where just floating with the rubber float can’t manipulate the surface sufficiently. The applicator then has to scrape the surface to achieve proper plane, then follows with a few passes of the float to remove any loose particles. The surface appearance has lines and scratches that are readily visible. In other areas where the stucco has remained open longer, the applicator can readily manipulate the surface with the rubber float and when dry leaves a denser, compact appearance. There may be both conditions existing within the same elevation at random intervals, that is okay and an expected result in appearance. One should be looking for a level hard surface for acceptance criteria in a brown coat; not whether it has scratches or grooves.
In an EIF system, the base coat and mesh is a weather barrier layer and is the first line of defense against the elements. A properly finished surface here will have no mesh color visible through the base coat. There may be some pattern visible which is usually attributed to the drying rate differential between the basecoat directly over the mesh and the square space between. This mesh-ghosting appearance may not be a pretty look but is compliant and functional. The hard and fast rule for EIFS is that 100 percent of the exposed foam needs to be covered with base coat and mesh, with 100 percent of the exposed mesh fully encapsulated in basecoat (mesh behind the foam, the backwrap, does not need to be encapsulated in basecoat).
Final Stages of Beauty
And finally, we are ready for the glam, the spit-and-shine, the final aesthetic stroke; the finish coat. If all of the previous layers have been applied properly, this coat is the definition of the word, finish. It finishes the surface to provide color, and texture. With cement stucco finishes an applicator should never have to use the finish materials to compensate for inadequacies in the brown coat or to parge-in voids and unevenness in the plane of the wall. There are however some finish textures that require two or three passes to achieve the desired finish appearance. In most cases these multi-pass finishes are the smooth variety and in some instances are used to achieve a multi-color appearance.
Remember when I said that the surface of a cement brown coat may have lines and scratches that are readily visible? These should not appear through any finish surface if proper preparation is done. For smooth stucco finishes the application should be a tight skim coat followed by another skin coat followed by the final skim which is wet tooled to the desired look. For sand finish, and spread and texture, the first pass will fill the variances sufficiently, while a second pass makes for the desired finished look. As a good rule of thumb, most cement finishes are double-footed, that’s plaster jargon for two coats.
Many years ago our industry moved to a sort of hybrid stucco, where the use of acrylic finishes vs. stucco finishes became very popular. These finishes are not designed to be applied to a thickness similar to stucco and so proper preparation of the brown coat is prudent. The application of an acrylic modified cement basecoat, skimmed on the brown coat, is the most efficient way to properly prepare a cement basecoat surface, when required. Typically, this is used for the smoother acrylic finishes. For all other acrylic finishes, I always recommend using an EIFS finish primer when applying directly to stucco. The porosity in a stucco surface may negatively affect the appearance of an acrylic finish. A primer mitigates the uneven porosity.
With EIF systems the finish is applied to the thickness of the largest aggregate in the finish mix. The base coat surfaces of an EIF system are relatively smooth and the finishes are designed to be applied in a single pass and at a relatively thin layer. Some of the smoother finishes do require a two-layer pass, while other textures may require a primer or skim product.
When viewing a finished surface in a stucco assembly or EIF system, there should not be any eye-catching discrepancies. If the texture has tortillas and pancakes (more stucco jargon) but they are consistent through the entire project, then it should be considered an acceptable appearance. If the sand finish has swirls and stroke marks that are consistent throughout, this should be considered acceptable. If the color has some variation but is the same for all of the surfaces then that too is acceptable.
The point is; consistency is the key to an acceptable finish. And here is some advice, if you submit a small sample, say 12- by 12-inches, do not allow it to be the criteria for any finished surface, instead do a sample area or sample wall. This larger area will then be the go-to example for the entire project. Finished.
Looking for a reprint of this article?
From high-res PDFs to custom plaques, order your copy today!


