The Process of Plaster Restoration
Confessions of a Plasterer
Images courtesy of Plâtres Vieujot

I must confess, as a plasterer I do not like the work of plaster restoration. Please don’t take that to mean that I don’t consider it important or a valid aspect of the art, I just have a preference for new work. My reasons are personal and valid for me.
In the context of new work, I have the ability to reach a high degree of perfection. In restoration work, perfection is not usually the goal. Often the substrate has shifted; walls and ceilings are not level. I have found myself obligated to just improve the situation, make it presentable. I find that frustrating. I would say one of the aspects of plaster working I really enjoy is having a hand in the design, be it color and finish, molding profiles or ornamentation. In restoration, all of these decisions have been made a long time ago and are buried under many layers of paint—did I mention how much I hate stripping paint? It’s like all the fun part is done already.
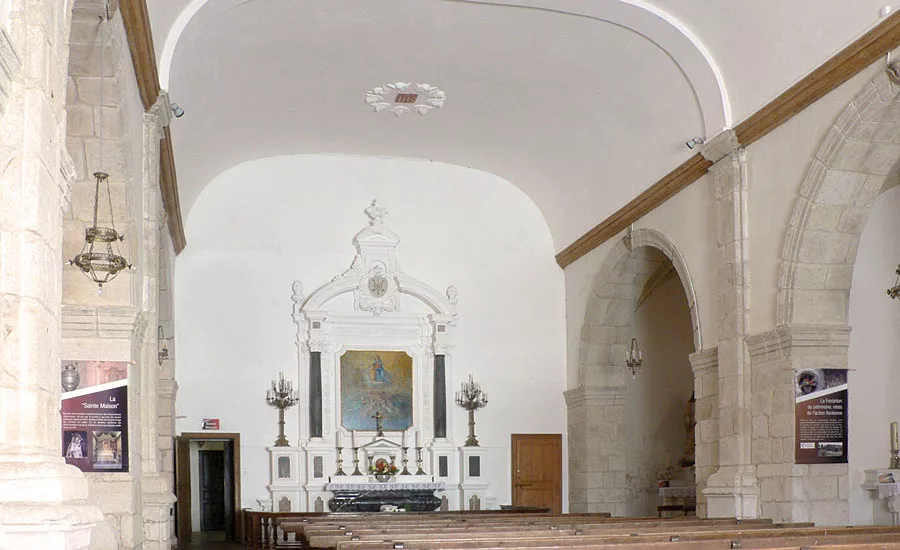
Irrespective of my feelings, I do live in downtown Charleston, S.C., so the matter of plaster restoration is unavoidable. Not to mention it breaks my heart to see plaster being ripped out to be replaced with drywall or losing some beautiful ornament to be replaced with absolutely nothing.
The Breakdown
I recently finished working on a small project that I think many will find the process very educational. But before I go into detail, I would like to share just a few general thoughts about the fundamental properties of applied plaster in the context of restoration and conservation.
The technical purpose of traditional plaster, stucco if you prefer, in the exterior is as a sacrificial coat. It sacrifices itself to protect the substrate, that is to say the building. It is not intended to be preserved. Rather rain erodes it; soluble salts evaporate at the surface, slowly deteriorating it. Better the plaster than the building. Plaster over masonry on the inside might last indefinitely. Plaster over lath is another matter. It has a lifespan. The wood or metal moves with changes in humidity and temperature, the plaster does not. Between these cycles and some inevitable structural shifting, eventually the bond of the plaster to the lath will break down, usually between 120 to 200 years in the case of wood lath. Not bad I’d say. Unless there has been water damage, the wood lath is good for another 200 years if sometimes the old iron nails need replacing.
One of the challenging situations that will occasionally rise is when a lath and plaster wall or ceiling has been enriched with ornament. The plasterwork has failed but you don’t want to lose all of that art, and I don’t blame you one bit. There are a few traditional solutions. If there is access to the back of the lath from an upper floor or attic, loose plaster can be secured from below using special types of washers, then new plaster can be added to re-adhere the plaster to the lath in the spots where the keys are cracked or completely broken. What I would strongly discourage is injecting some kind of epoxy or glue to fix the broken plaster to the lath. This is a one time, short term effort that destroys the re-usability of the lath. These proprietary “solutions” also tend to form a vapor barrier that causes other problems, as well.
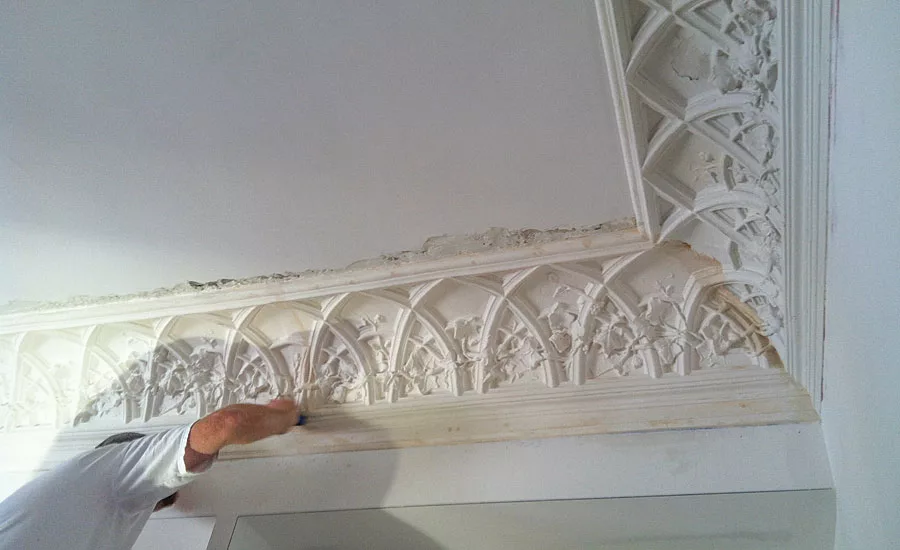
If access is not possible, it is often possible to save much of the ornament by simply cutting it out, setting it aside to be re-affixed once the surface has been re-plastered. There are other instances where there is partial water or fire damage so that some of the ornament is lost. This is a similar scenario to my recent project where a room was being shortened in a remodel of an older home in downtown Charleston. I was asked to consult on a highly enriched cornice to see if it could be removed from the wall that was to be demolished. The cornice was so large and so well plastered to the wall that is was practically impossible to remove it without destroying the pieces.
A Traditional Solution
Working along with students and alumni from the trowel trades program of the American College of the Building Arts, we took on the restoration of a highly enriched Gothic Revival plaster cornice installed in an early twentieth century home downtown Charleston. Below is a description of the traditional solution that we offered that worked quite well.
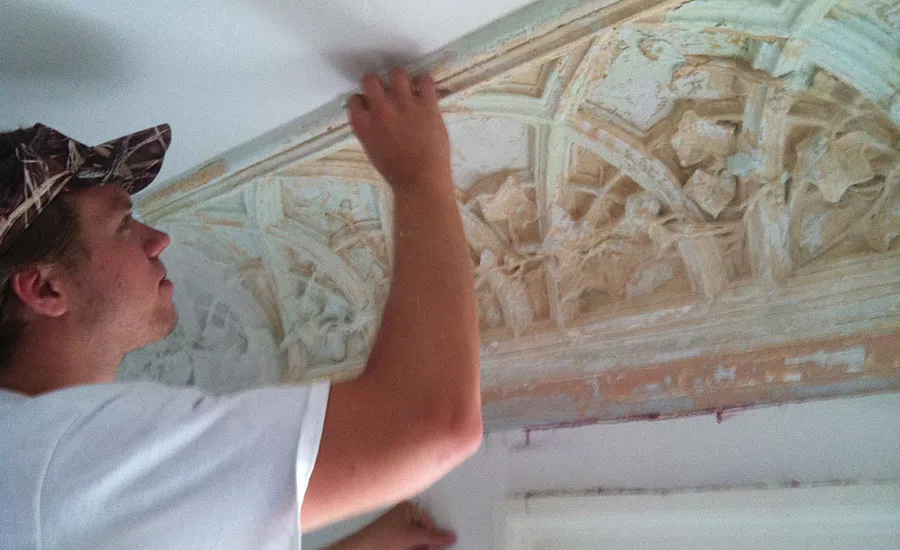
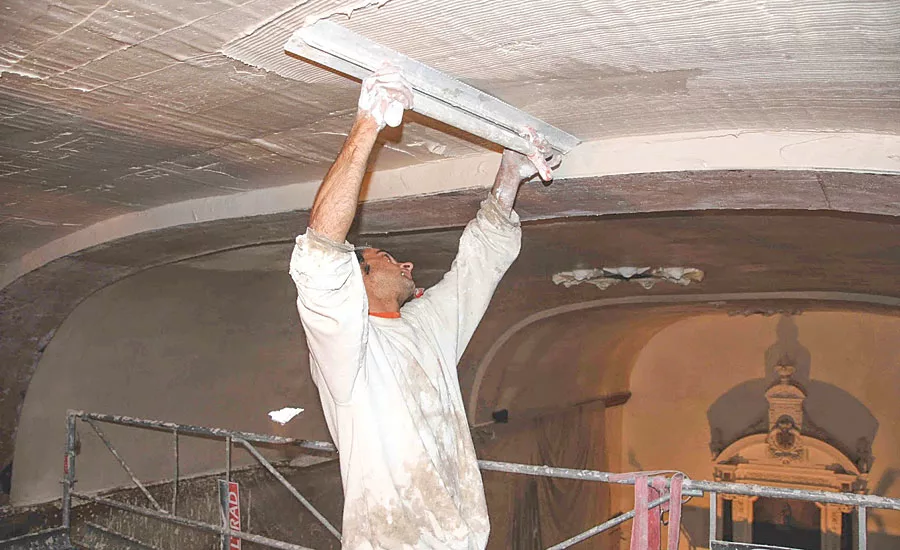
Stripping Paint
We identify the pattern repeat and painstakingly remove scores of paint layers (did I mention how much I hate stripping paint?). Usually, I prefer to use an alkali paste to strip paint, especially if it is a large wall. However, it is a challenge to use on relieved ornamentation. In this case, having a small surface area to cover, we utilized a chemical stripper.
Framing
We have to create and affix a plywood frame to enclose the pattern, using clay to seal the ends.
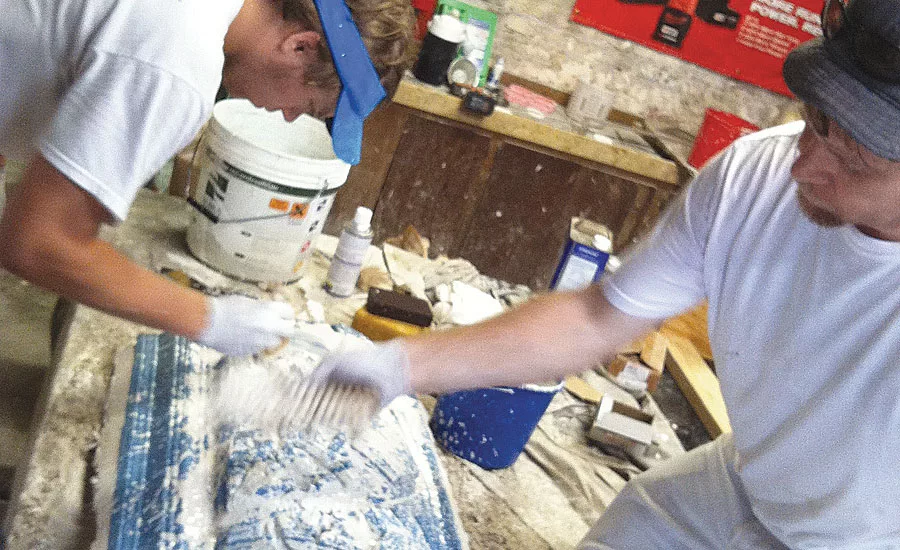
Rubber
The rubber we chose is a two part urethane on the softer side. We alternate the colors beige and blue between layers so we can gauge coverage and depth, starting off thin to get in all the nooks and crannies, adding thickener to quickly build on the final passes. It is important to have a minimum of 1/4-inch thickness and create relief angles so that the plaster applied in the next step does not lock into the rubber and get stuck.
Jacket Mold
The rubber captures the pattern; however, it is very flexible and will not keep the form. Several layers of gypsum plaster are applied to the back of the rubber. These are reinforced with fiberglass and hessian cloth to increase tensile strength and reduce weight. It has to be thick enough to be strong, yet you must be careful not to make it too thick or you’ll never get it off. The plaster sets very quickly forming a rigid “jacket” also known as a mother mold that will keep the rubber in its original position.
Casting
The molds are removed and brought back immediately to the college workshop, placed on a bed of sand to reduce deformation. After drying over the weekend, we can use the negative mold to generate new plaster positives, our cornice pieces. Again, to reduce weight and enhance tensile strength, fiberglass veil is embedded, a technique called GFRG.
Crating
The plaster only takes a few minutes to set. The process of setting puts a lot of internal stress on the molding. We must find a way to prevent them from deforming. Since we need a safe way to transport them back to the site we build wood frames and mechanically attach the moldings to the frames.
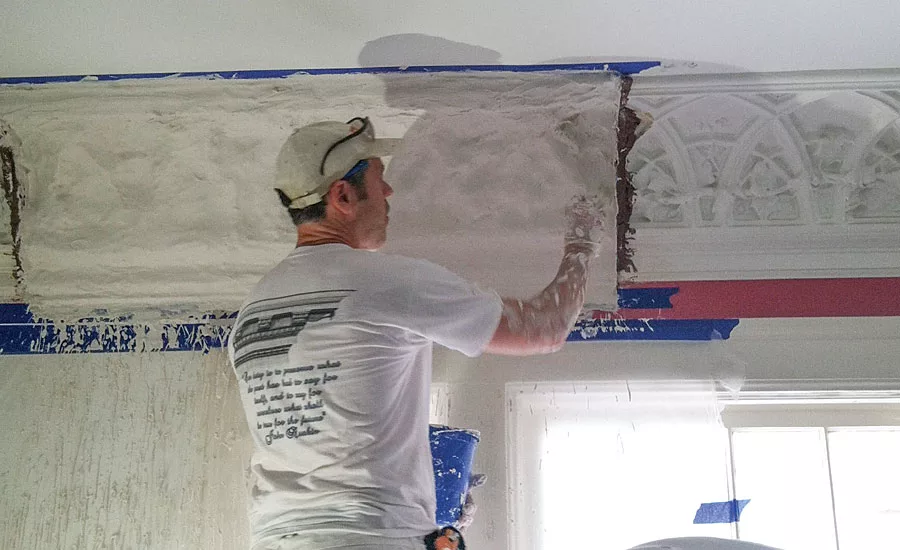
Affixing
Completion in view, the next task is to affix the plaster moldings to plaster with, you guessed it, plaster. We do use some temporary plywood blocking to align our pieces and help support our pieces from below. Also, a few galvanized screws are used at the top to secure the cornice until the plaster has set. It is optional to remove them later. We’re in a seismic zone so I’m going to leave them in.
Pointing
The final step is to join all of our pieces with each other and to the existing molding. This is done with plaster. Because plaster sets quickly, we mix a little bit of rabbit skin size as a retarder in our water to give us more time to work. A bit of sanding in spots and it’s ready to be primed and painted.
Everybody was really happy: The contractor that he could find folks with skills to do the work (he's already given us a nice recommendation for a project we’ll tackle), the owner who was afraid they might lose the cornice or have it missing on one wall, and the sophomore students who got to learn an advanced skill during their summer internship. A special thanks to alumnus Michael Lauer who was the plaster contractor for this job. I recommend giving his website a look at michaellauerstudios.com.
Looking for a reprint of this article?
From high-res PDFs to custom plaques, order your copy today!


