History of Veneer Plastering
To better understand why we distinguish some plasters as veneers it may be helpful to review how plasters have been applied traditionally. A traditional plaster render is typically a two or three coat application that has a total thickness of at least 5/8-inch, often even thicker. These are generally applied to two kinds of substrates. Plaster renders can be directly applied to some kind of masonry unit such as stone, brick, terracotta, rammed earth and adobe or industrially produced materials such as CMUs (cement masonry units), AAC block (autoclaved aerated concrete) or cast-in-place concrete panels to name a few. The other traditional means of applying plaster is over a lath substrate mechanically affixed to a timber support.
Lath is a type of net or web that the plaster is pushed through, hangs on to and sets around. Lath supports can be made of traditional reeds (wattle) and wood strips, as well as by industrial processes such as expanded metal and plastic laths.
Veneer plasters on the other hand are used to coat drylining, industrially produced sheathing panels. The most commonly available drylining sheathing is drywall. Drywall, also known as plasterboard, most often utilizes a paper facing front and back that contains a gypsum core of between 1/4 to 1-inch thickness. Some “paperless” drywalls use fiberglass instead of paper on the facing.
Other drylining boards include magnesium oxide board, cement backer boards and wool wood boards. A variety of plasters are applied as veneers of anywhere from 1/16 to 1/2-inch or more on these drylining materials. Some of these veneer plasters are formulated to be used over specific plasterboards and are sold as veneer plaster systems. Others are traditional finish plasters that have been adapted to use as a thinner coating over drylining substrates. We’ll consider both subsequently.
Veneer Plaster Systems Overview
Drywall was developed in the late 19th century and was largely perfected by the first World War where it found widespread use by the U.S. military for the rapid assembly of temporary barracks. Early veneer systems were designed to emulate traditional plastering; the drywall was intended only to reduce the installation of lath and application of 3/8-inch scratch coat into a single step. After that, like traditional applications, they received an approximately 1/2-inch brown coat of gypsum plaster and were finished with a thin, polished coat of lime and gauge (gypsum plaster to accelerate the set).
Although a specification reserved for specialty applications, this earlier version of the veneer system is still available and performs extraordinarily well in durability and fire resistance.
Within a couple of decades, the veneer plaster systems became thinner and more lightweight. The gypsum core of the plasterboards began to be entrained with air and mixed with fillers. The brown coat was replaced with a basecoat, a blend of gypsum and finely sieved sand that allowed the plaster to be applied to a consistent thickness of under 1/8-inch thickness. Though, traditional lime gauged with gypsum can and occasionally is still used over the veneer basecoat, a purely gypsum finish plaster was formulated that was a bright white and that could be readily brought up to a polish. Both the basecoat and finish veneer plasters come ready mixed with retarders that control the set time.
Additional retarder is likewise available to extend the setting time even further, sometimes useful for large surfaces and production work. It is even possible to forego the basecoat and apply the finish as a single coat veneer.
Veneer Plaster Systems Means, Methods and Specifications
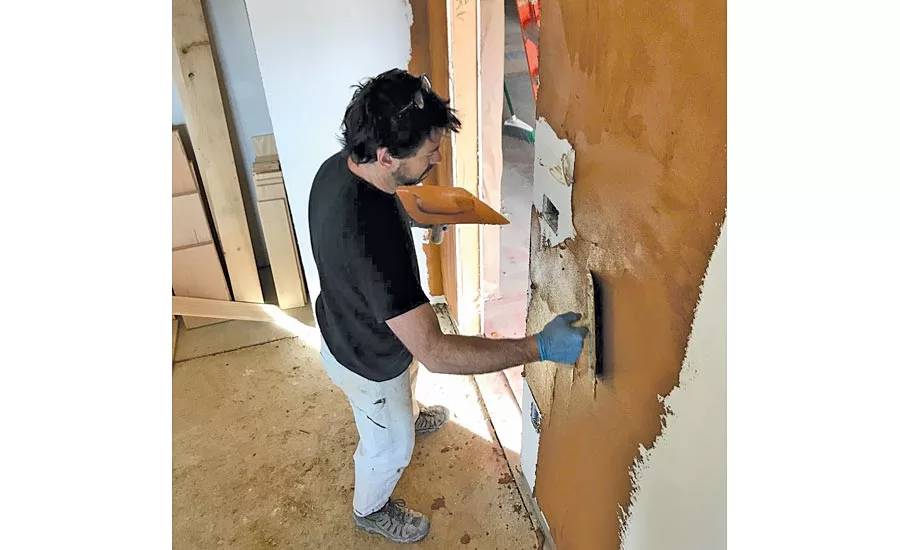
Plasterboards with a special paper are manufactured especially for use with veneer plasters. Unlike regular drywall, veneer base plasterboards are faced with a highly absorptive paper that contributes to a strong bond for plaster. The paper for these boards is typically a darker greyish blue color and are known as “blueboard” among plasterers. If blueboard is not available, particularly for the thickness of plasterboard sometimes needed, regular drywall can be substituted but should receive a coat of glue known as a bonding agent.
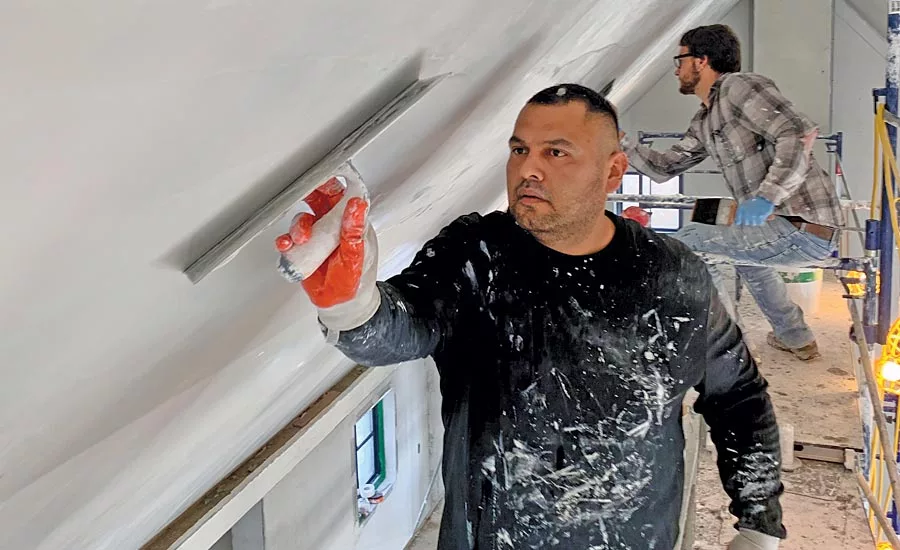
The bonding agent can sometimes also be used for other surfaces receiving veneer plasters such as cast concrete. Special fiberglass mesh tapes that have additional, diagonally running threads are also manufactured that provide additional strength for use where the plasterboards abut. There are also straight cornerbeads that are specifically made for one and two coat veneer plaster systems. Alternatively, in some situations such as when there are curvilinear terminations such as found with windows, various openings and transitions it can be advantageous to customize corners out of gypsum molding plaster, using them as screeds for the veneer plaster to form edges.
Next is a breakdown of a basic two-coat veneer plaster application over a blueboard substrate that has had mesh tape applied to the joints and cornerbeads on the corners, assuming the substrate is relatively planar and ready to go.
A small mix of the sanded veneer plaster basecoat is prepared and applied to the joints having mesh tape. This allows the joint area to firm up while a larger mix is prepared for the entire surface. This is applied either as a single pass or you can double up with a “sweetcoat” of a small amount of additional plaster if it helps to get a more even coverage of approximately 1/8-inch or just a bit less. The basecoat is held off a small distance from the very corner of the bead. After about 30 minutes to an hour the basecoat will begin to change color, to “brown” as it begins its to? set
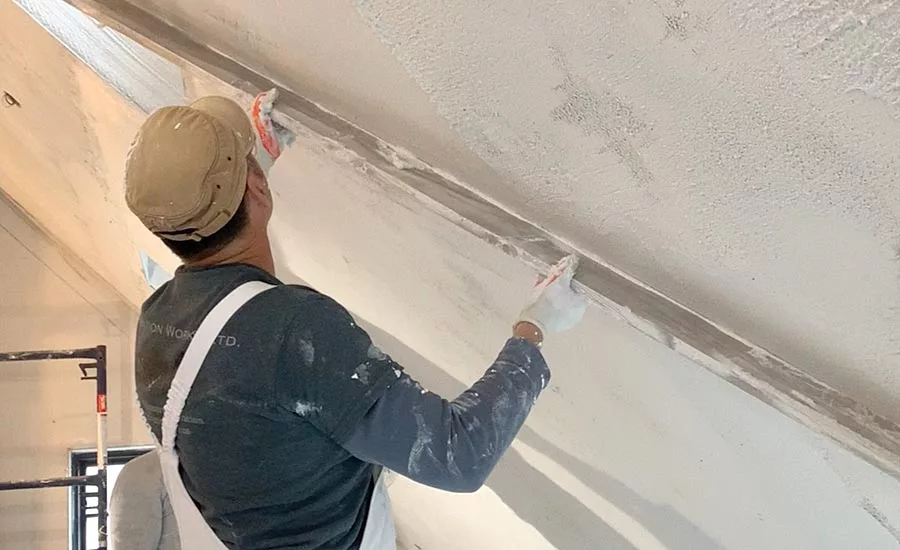
At this time, some minor imperfections in the surface can be ironed out with the trowel. The following day usually provides plenty of time for the veneer basecoat to fully dry. Sometimes veneer basecoat plasters can be finished with care as a lightly or more dramatically textured final surface.
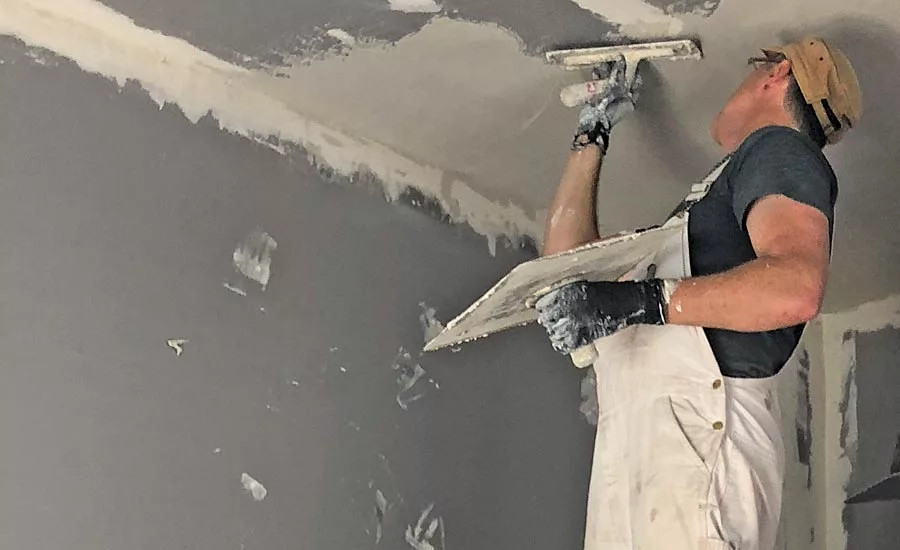
The veneer finish plasters have much less aggregate than the basecoat plasters; the aggregates they do contain are very fine. This allows them to be worked up to a very smooth surface. After mixing the veneer finish plaster it is first applied to the cornerbead. Then it is applied with hawk and trowel to the entire surface of the wall and ceiling. Personally, I find it useful to screed this first coat down in both directions with a “slicker” straight rod that comes to a fine edge. After that, similar to the basecoat, a second sweetcoat of the same material is applied. As the material begins to firm up a small amount of the plaster can be applied, dashed with a brush and used to lubricate the surface, getting it even smoother.
Finally, as the finish coat begins to brown, water can be added either with a spray bottle or my preferred method, of a felt brush to iron the surface with a trowel until perfectly smooth. Veneer plaster systems are formulated and intended to be painted. They are ready for paint as soon as they are fully dry, which normally takes just a day or two.
Starting from the assumption that for schedule or budgetary reasons a plasterboard substrate has been selected in favor of a traditional masonry or lath substrate, where should veneer plaster systems be specified? Two-coat veneer plaster systems are very durable and impact resistant. They are an ideal specification for institutional use such as schools, museums as well as any public, high traffic area such as commonly found in hotels, restaurants and government buildings. In my opinion, it ought to be a minimum standard for the common areas of fine homes as veneer plasters provide an enduring system that can be expected to long outlast the mortgage.
Decorative Veneer Plasters
As previously mentioned, a number of finish plasters of traditional plaster systems have been adapted as veneer plasters over drylining substrates. These are of the more decorative variety, finishes that are often integrally colored and valued for the intrinsic beauty. Clay has been used for thousands of years in earthen architecture all around the world. This was and, in some places, continues to be the plaster finish for indigenous adobe dwellings of the desert southwest of the United States and Mexico.
Many folks love the look and feel of clay plaster and small manufacturers have adapted the local formula so that they can be applied over plasterboard with an intervening coat of sanded primer. The Italian and especially Venetian tradition of marmorino is really a multi-layered application of lime renders over brick and stone starting with thick, rough coats and working one’s way smoother in successive coats. As with the clay plasters, the integral colored finish layers of marmorino and the smoothest, shiniest version coined “Venetian plaster,” have been slightly reformulated and adapted for plasterboard to become popular choices for restaurants, hotels and fine homes. Designers and homeowners have caught on to the possibility that the beautiful plasters that they see around the world might be possible to have right here at home.
Increasingly, we’re seeing traditional finish plasters from Japan, Morocco and France begin to be available as veneer plasters here in North America. All of these decorative traditions deserve their own consideration and I look forward to sharing with you more about them and the traditions from which they originate in future articles.
Looking for a reprint of this article?
From high-res PDFs to custom plaques, order your copy today!


