All Things Gypsum
Stay Ahead of the Curve
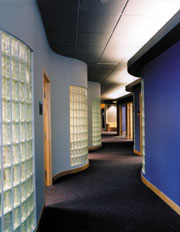
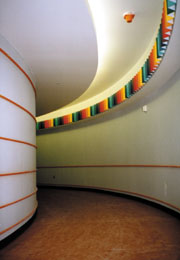
To form a cylindrically curved surface using gypsum board, simply use a tighter framing spacing than is used for flat surfaces. Forming smooth—even curved—drywall is done by spacing the framing closer than the usual 16 or 24 inches on center. In forming very tight radius surfaces, it may be necessary to space framing as close as 6 inches on center. Wider spacing may not provide uniform support for the curved gypsum board and can result in flat spots on the wall or ceiling surface. One should attach the gypsum board with nails or screws; an adhesive application without mechanical fasteners should not be used when forming curved surfaces.
The bends
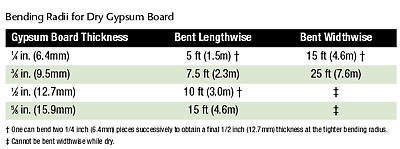
The gypsum board can be bent using one of two methods: the dry method or the wet method. The dry method is useful in achieving large, sweeping curves, but it is limited by the ability of the gypsum board to be bent without breaking. The minimum radius to which dry gypsum board can be bent depends on the thickness of the gypsum board and the direction in which the board is being bent; i.e., lengthwise or widthwise. The minimum recommended bending radii for dry gypsum board is given in the table below. The minimums can be reduced by building up thinner thicknesses to achieve the needed overall thickness. For example, if the wall or ceiling surface requires a final thickness of 1/2 inch of gypsum board, two layers of 1/4-inch board can be used to achieve the tighter radius permitted for 1/4-inch thick board.
In addition to building up the needed final thickness with multiple layers of the thinner boards, tighter radii can be achieved by using the wet method. By moistening the face and back papers of the gypsum board and allowing time for the water to penetrate into the core (as described in Section 15 of GA-216-2000, Application and Finishing of Gypsum Board), the gypsum board becomes pliable and can be bent to conform to very tight radii surfaces. The entire face and back surfaces of the gypsum board to be bent should be moistened with clean water using a short nap paint roller, a water pump or a spray gun. As wet board is heavy and easily damaged, it must be handled very carefully. Water should not be allowed to stand or puddle on the moistened gypsum board. In addition, the moistened gypsum board should be stacked flat on a flat surface. Once the board is installed and is dry, it will return to its original hardness but retain its new shape.
Concave/convex
If project plans call for the installation of gypsum board to form a concave surface, begin by applying a stop at one end of the curve to restrain one end or edge of the gypsum board during installation. The field of the gypsum board must be forced to make firm contact with the framing. To achieve this, apply pressure to the unrestrained end or edge of the gypsum board and fasten the gypsum board working from the “stopped” end or edge. The gypsum board should be held tightly against the framing while the fasteners are being driven.When installing gypsum board to form a convex surface, first attach one end of the gypsum board to the framing with nails or screws. Progressively push the gypsum board into contact with and fasten to subsequent framing members, working from the fixed end to the free end. As with creating a concave surface, the gypsum board should be held tightly against the framing while driving the necessary fasteners.
In addition to large surfaces, gypsum board is often used to form the curved portion, or inner face, of archways. In this instance, one can use the wet method described above. Alternatively, score the back paper across the width of the board and then make parallel score marks spaced approximately 1 inch on center with the core broken at each cut. Hold the gypsum board tightly against the supporting framing and drive the fasteners to complete installation.
Aesthetically appealing wall and ceiling detailing can be achieved through the innovative use of gypsum board. The formation of curved surfaces is but one example. If you have recently worked on a project that features an innovative use of gypsum board, enter the Gypsum Association’s 2002 Excellence in Gypsum Board Design and Construction awards program. Complete awards program details are available on the Gypsum Association’s Web site at www.gypsum.org where an entry form can be downloaded. W&C
Looking for a reprint of this article?
From high-res PDFs to custom plaques, order your copy today!


