Common Acoustic Assembly Mishaps


This month, I’ve teamed up with Seth Harrison, a Senior Associate at Metropolitan Acoustics, to share a few stories of acoustic assembly mishaps we have both seen time and again during our careers. Although, there are always those that will point fingers, and like most unintended consequences, acoustic assembly mishaps are typically the result of a chain of small, perfectly sensible decisions made by numerous people, extending from the first design concepts, through the actual building construction. In the future, the design and construction of a building will include a digital twin: an immersive computer simulation of the building that looks and sounds exactly like the real-world building. The effect of all those small decisions will be immediately obvious and correctable long before construction. Until then, be on the lookout for these common mishaps.
Walls Mishaps
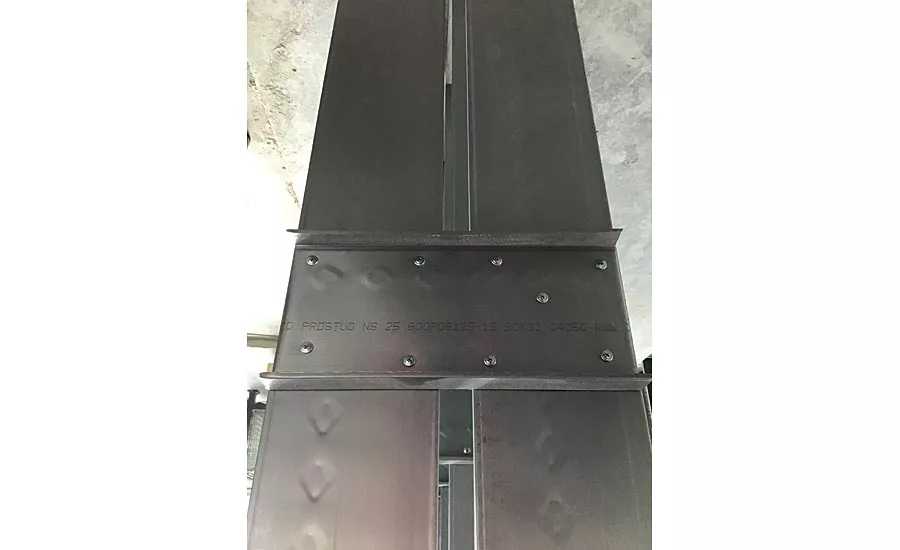
Designers and builders will often use heavy gauge metal or wood studs with short stud spacing to make single-stud walls as stiff as possible in the belief that walls must be robust to provide good sound isolation, but the exact opposite is true. When walls remain flexible, they are able to absorb more of the incident sound, converting it into heat much like batt insulation does in the stud cavities. Decreasing the stud gauge, increasing the stud spacing, and using resilient products such as resilient channel, stud isolation clips, engineered drywall, or viscoelastic damping compounds, are all meaningful ways to introduce flexibility into the wall assembly.
In the same vein, double stud walls provide excellent acoustical performance because the incident sound on one side of the wall and resulting vibration is not efficiently transmitted to the stud row and drywall on the other side of the assembly. It’s completely understandable to expect that double stud walls may require bracing, fire blocking, or conduit feeding electrical boxes on each side of the wall. However, the story changes as soon as the two sides of the wall are connected. Structural bracing, drywall fire blocking, and rigid conduit, bridge the two rows of studs, locking them together, increasing the stiffness, and negating the intended acoustic benefit. The solutions are to use studs that can span the required distance and meet the deflection criteria without bracing, to fill the wall cavity with batt insulation rather than using drywall for fire blocking, and to use flexible electrical conduit rather than rigid conduit.
In retrofit applications, we often see an attempt to address a sound isolation issue by mounting an additional layer of drywall on furring over an existing hollow CMU or stud wall, which already has a layer of drywall on each side. By doing so, the partition becomes the dreaded triple leaf construction, meaning there are three layers of mass (i.e. CMU or drywall) separated by two air cavities (i.e. the original CMU or stud cavity and the new cavity created by the furring). This configuration is prone to acoustical resonances that will often result in less sound isolation at lower frequencies than the original wall prior to the added drywall layer.
Bass from amplified music falls within this low frequency range and is often the source of complaints. If possible, mass should be added directly to the existing wall without creating a new air cavity or the new cavity should be carefully designed so that the dip in sound isolation performance occurs at a frequency range of less consequence.
Gaps Mishaps
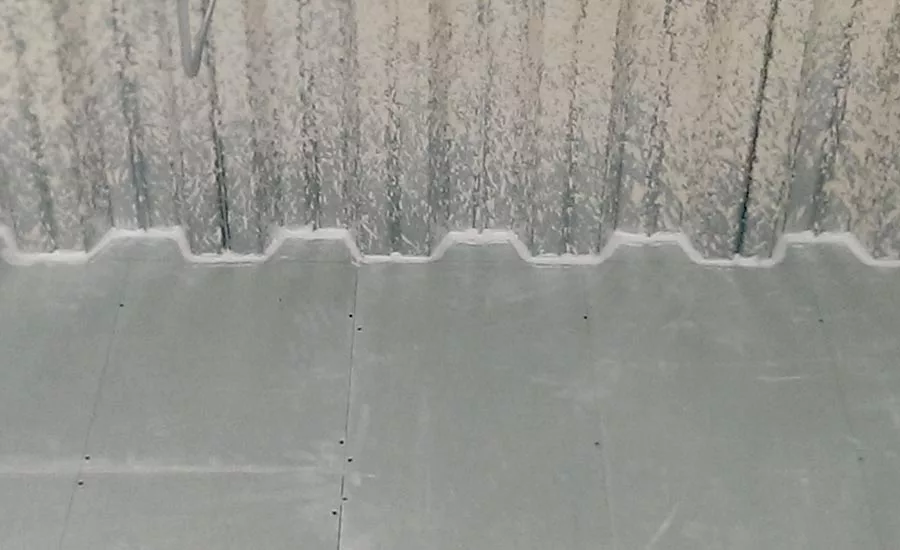
If the wall isn’t short on mass to block low-frequency sound transmission, it may suffer from the common issue of having leaks. Gaps in the construction will allow sound to easily bypass the wall. The size, shape, and location of the gaps affect the frequencies and amount of sound that travel through them. The adage, out of sight, out of mind, definitely applies here. If gaps are going to be covered by wall base, quarter round, cover plates, crown molding, or ceilings, it’s easy to assume that they don’t need to be sealed. But if we think of sound as water filling an enclosed room, water will find all of the gaps and escape into the adjacent spaces.
Achieving a water-tight enclosure is a good way to keep in mind that all gaps need to be sealed. Seals are best made by bringing the mass of the floor, wall, or ceiling up to within half an inch of the adjacent structure or penetrating item and filling the gaps with closed-cell foam and resilient caulk.
Room Finish Mishaps
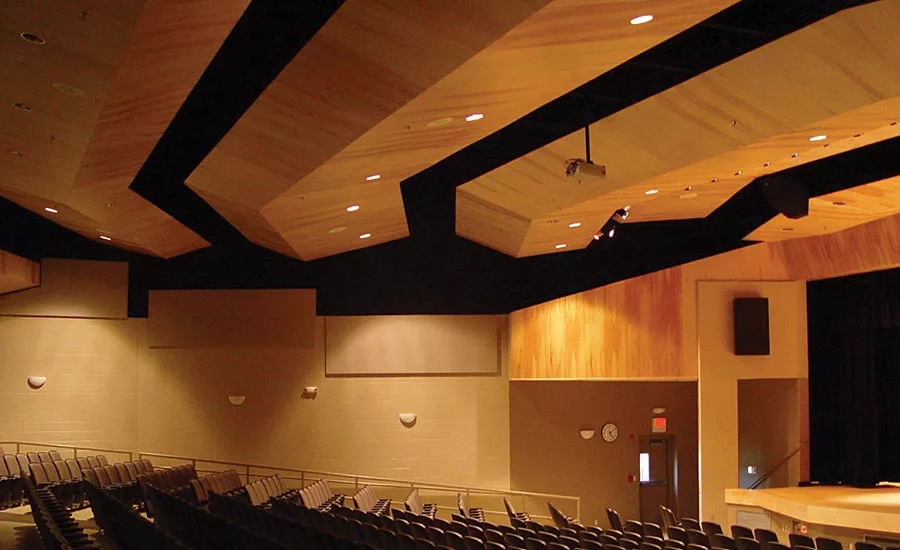
Room finishes include the raw surfaces of the room’s building components, various types of wall and ceiling panels, floor and wall coverings, and hand or spray-applied paint, plaster, and cellulose finishes. Room finishes are selected and positioned only to modify sound within the room, to create its unique impulse response, reverberation curve or “room acoustics.”
One recurring “inconvenient truth” is the fact that room finishes do not have much effect on blocking sound from entering or exiting a room. For example, no amount of any room finish will improve a poor STC rating created by the various wall mishaps described earlier. Unfortunately, faced with the high cost of complete wall remediation versus the foggy promises of the latest miracle paint that seals out sound, human nature tends to hope for the best and throw away good money after bad.
Although project drawings tend to group all room finishes under the term “acoustic,” different finishes provide very different functions. Glossing over this when comparing contractor bids commonly leads to the substitution of cheaper, ineffective finishes for the intended ones.
Painting over new or old acoustic finishes continues to be the number one room finish mishap. Painting closes up the surface pores and reduces the capacity of the underlying acoustic finish to absorb sound. Painting over specialty finishes such as Sonaspray must be carefully planned to minimize the loss of sound absorption and to avoid chemical reactions which can create off colors.
Although the misapplication of room finishes can be a complete waste of money, the misuse of some materials as room finishes is downright criminal. Readers who may doubt this are encouraged to visit the Station Fire Memorial Park, facebook.com/StationFireMemorialPark, a memorial to the 100 killed and 200 injured in the Station Nightclub fire.
Room Geometry Mishaps
The shape of the room and the structures within it control how sound energy is mixed, diffused and distributed throughout the room. Unfortunately, the room types which tend to cause the worst acoustic problems are those which just happen to be architecturally interesting, namely: domes, cylindrical tower rooms, rooms with concave walls and barrel vaults, and cubical rooms. In most rooms, the sound reflected by each room surface diffuses evenly, and we perceive the blended reflections not as a copy of the original sound, but as the acoustics of the space. In the problem room types listed above though, reflections become focused in space and amplified in time, producing echoes, slap echoes and even more bizarre acoustic faults.
These problematic shapes can be used, but the finishes must be carefully planned to prevent acoustic problems which can quickly cause the room to be un-usable. For example, the 1819 Hall of the House of Representatives in the U.S. Capitol building was designed as a Greek revival amphitheater with a quarter dome roof. The focused reflections from the dome and curved walls made speech in the House unintelligible. Draperies were hung on the walls and seating was rearranged to try to fix the problem, but they gave up and decided to build a new Hall in 1850. The Old Hall is now the National Statuary Hall.
MEP Mishaps
Mechanical, electrical, and plumbing systems are frequently sources of noise in buildings. Designers and builders often consider the airborne sound emanating from loud pieces of equipment such as generators, cooling towers, and chillers. Often overlooked is structure-borne sound, which is audible sound from the building structure that is excited by vibrating MEP equipment in contact with the structure. It’s not uncommon to see an attempt at isolating MEP equipment from structure by placing the equipment on a rubber pad or steel springs. However, proper isolation can only be achieved if the isolator is selected to provide isolation over the required vibration frequency range and all connections to the equipment are resilient.
Coordination Mishaps
Acoustic assembly mishaps are typically the result of a chain of small, perfectly sensible decisions made by numerous people, extending from the first design concepts through the actual building construction. Acoustic problems arise when the overall effect of these small decisions is not tracked and coordinated.
Unbalanced noise barriers are a very common coordination mishap. Simply put, noise isolation is only as good as the weakest noise barrier. Typical mishaps include high STC rated walls paired with hollow core or unsealed doors and mixing thermal windows with acoustically rated windows. The high premium paid for the high STC component is wasted money since noise easily passes through the weak link, the proverbial four dollar hole in the million dollar dam.
Achieving good acoustics is a team effort and does not happen without coordination between disciplines.
Although we only touched upon a few acoustic assembly mishaps in this short article, the writers invite readers to attend our hour-long Webinar “Common Acoustic Assembly Mishaps” which will occur on Wednesday, October 17, 2018. Continuing education credits for both AIA and USGBC will be available for the Webinar. Sign up at buildingenclosureonline.com/BE-University. And invite a friend.
Looking for a reprint of this article?
From high-res PDFs to custom plaques, order your copy today!


