Walls & Ceilings logo
search
cart
facebook twitter linkedin youtube youtube Spotify Podcasts Apple Podcasts Spotify Podcasts Apple Podcasts
  • Sign In
  • Create Account
  • Sign Out
  • My Account
Walls & Ceilings logo
  • NEWS
  • TOPICS
    • Drywall
    • Stucco/EIFS
    • Ceilings
    • Steel Framing
    • Fireproofing
    • Interior Plaster
    • Building Envelope
    • Insulation
    • Technology
    • Interior
    • Exterior
    • Women In Construction
  • COLUMNS
    • Up Front
    • All Things Gypsum
    • Art & Craft of Plastering
    • Stucco Stop
    • Steel Deal
    • Industry Voices
  • PRODUCTS
    • Buzz Guide
  • EVENTS
    • Industry Events
    • Webinars
    • BUILD Expo
  • MEDIA
    • Videos
    • Podcasts
    • Photo Galleries
    • BUILD26 Videos
    • Take our Quiz!
    • Infographics
  • EXCLUSIVE
    • Newsletters
    • Top 50 Contractors
    • Contractor of the Year
    • Top 25 Exterior Plastering Contractors
    • State of the Industry
    • W&C Store
    • Market Research
    • CEUs
    • Sponsor Insights
    • Custom Content & Marketing Services
  • DIRECTORY
  • EMAGAZINE
    • eMagazine
    • Advertise
    • Archive Issues
  • SIGN UP!
Columns

Plaster Man
Finishes (Part 2): Sand Finish and Texture
By Robin Raymer
May 1, 2002
Part two in Robin's discussion on finishes.

Photo 1


Photo 2
Last month, we looked at smooth finish coat, the repair of it, as well as one- and two-coat finish that's used in new construction. This time we're going to go into the way a job site is set up for sand finish and for texturing. Next month, we'll look at 10 texture styles and techniques used to do them.

Photo 3
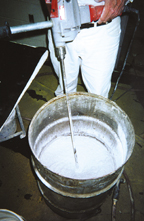
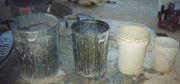
In photo #1 there are different sized buckets and barrels used to mix material in. We've put down a blue plastic drop cloth to designate our mixing area.

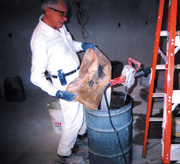
Photos #2 and #3 shows the use of a very sturdy barrel. Marvin Newman, my father-in-law, is mixing up some sand finish that will be used both for the sand finish on the ceiling and also the texturing that will be done on the walls. Water is always put in the barrel first, then the lime and Keene's cement is added at about the same time. The sand is added at the end. Mixing is done for about five minutes and then the mix is allowed to set another five minutes, then mixed again. Because there is so much lime mixed with this type of finish, a lot of water is used in comparison to basecoat mixes. For large mixes, the Milwaukee drill pictured is used by Marv, which mixes at one speed. He likes the variable slower-speed drill the company has which helps control the mess.
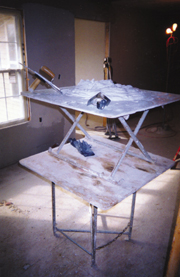
Photo 4

The difference between textures

Sand finish is different from smooth coat mixes in that there is a lot of time to work with it. It won't set up hard for about 24 hours in the bucket. And even if it does, it's the one type of plaster that can be re-tempered and used again. Some more Keene's cement can be added when it's re-mixed and it's ready to go again. If it is left over, we usually will add some water to thin it down and this makes using again easier, as the thinning keeps it from setting up hard (using a scoop of sand finish will help accelerate a batch of basecoat very effectively and adding molding plaster to sand finish will make it set-up quickly).
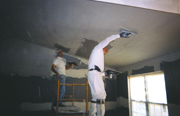
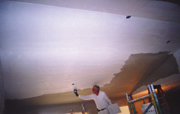
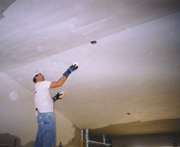
Photo 5
In photo #4 is an example of a board and stand set up. This one serves both the worker on the bottom and whoever is on stilts. It gives the laborer a place to unload the mix so he's not completely focused on dipping plaster to the crew. This frees the laborer up to clean up and get the next batch mixed up.

Photo 6
In photo #5, one person is working off the rolling scaffold and another working off of tall stilts. In this particular shot they are completing the basecoat in the living room. In this case, a 5-gallon bucket can be filled by the laborer and used by the person on the scaffold. Anyone on stilts can work off a board or "be dipped" the plaster to cut down on the amount of walking they have to do.

Photo 7
The first thing we tackle is all the ceilings and walls. In photo #6, Marvin is spreading sand finish over the ceiling area. It's best to take as long a stroke with the trowel as possible. Many plasterers get into a bad habit early on of using choppy type movements when spreading plaster.

If you find the plaster is skipping where there's plaster that's bare or thin, just go back and fill these in. It's better to get into the habit of using long strokes right from the start.
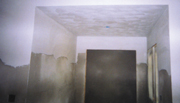
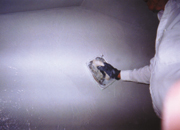
Photo 8
In photo #7, Jeremy is beginning to sand finish swirl the ceiling behind Marvin. If there are three people working a room, one effective method of sand finishing the ceilings is to have both top people run sand on until about half the ceiling is done. Then one continues spreading sand while one drops back and begins to sponge float the area. Meanwhile, the bottom person can be running the bottoms of the walls up as high as he can reach, and also catch the closets. A smaller ceiling is already complete in photo #8 and the top crew turned the wall partially (side point: Hot water is used when swirling is done. The reason is to keep the sponges pliable so that they don't dig into the surface). Notice that Jeremy is using rubber gloves. This is very important, especially with lime and sand being used, which can be very caustic to the skin, causing chemical burns. Apple cider vinegar is good for neutralizing any lime that gets on your skin.

Photo 9

Other people

Some crews I've visited double coat everything. They run a tight coat of sand finish over the ceilings, then go back over them with a second coat. Then the person floating the ceiling does a preliminary pre-float. He goes over the entire ceiling or perhaps just part of it, maybe 5 or 10 feet, roughing up the sand finish that brings the sand to the surface of the finish. Depending on how wet or dry the ceiling conditions are, he will then finish the ceiling out with a sand finish swirl pattern. Other crews like the random float look, where no particular pattern is put on the ceiling, just a roughed up look. One other crew I met had a really neat look they added to their ceilings. They took a rectangle yellow sponge that was about 8 or 9 inches long and swirled tight, complete circles all over the ceilings. This left a distinct and unique look and it was kind of their signature they left on the ceilings they did.

If the ceiling is not going to be painted, it is very important for the person floating the ceiling to complete the job as quickly he can. It's vital to keep a wet edge, meaning he should keep floating the ceiling back and forth, not leaving any edge more then five minutes at a time. The reason is that if part of a ceiling is swirled and left for too long, when swirling is started up again, a definite line will appear. It's not that the plaster will be any higher or lower, it's just that in the overall ceiling you will notice a definite line or difference in the way the plaster dries out, so that the finished product will not have a nice consistent look overall. This is especially critical if color is ever added to the sand finish. A difference in the actual coloring will be noticeable where the floating is started and stopped, so once the floating starts on a wall, it's highly recommended to go for the finish line!
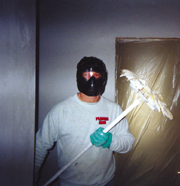
Photo 10
For the walls in this house, once the sand finish was applied, instead of floating them down with sponges, a texture was the next step. Take a look at photo #9. Marvin is using sand finish that has been thinned down. With the use of a hand-made texture pad, made from an old hawk and a piece of carpet attached to it, he applies a coat of texture over the whole wall. He works out of a 3-gallon bucket. Photos #10 and #11 show another way of texturing both walls and ceilings. I found that when doing work overhead, especially texturing, a paint ball mask worked good in protecting my eyes and face. In photo #11, I used a piece of 15-pound felt paper, pouring the sand finish texture onto it and using a two-headed texture pad. This pad is used to make a crows foot pattern with joint compound, but it also makes a nice-looking texture with plaster. It also covers a lot of ground in a short amount of time.

When using sand finish texture, a few things should be kept in mind that will prove helpful.
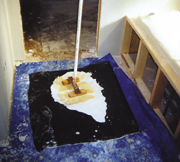
Photo 11
If the basecoat is done the day or before, then it's important to make sure the sand finish sets up before the moisture is completely drawn out of it. Dry walls and also a lot of air movement through the house can be very damaging to the texture. Keep in mind that sand finish with Keene's cement is the only type of plaster that can be re-tempered and used again. If there is sand finish left over from a job, it can be thinned down and will not set up. Keene's cement can then be added again and the plaster used with good effect.

If the conditions are very dry in a house, there is a danger of the texture checking. This is where the moisture is pulled out and the texture does not have enough time to cure properly and grab onto the basecoat. Small crack marks will occur and the affected texture will have to be scraped off and redone. There are several things that can be done to avoid this tragedy. One is to fog down the basecoated walls with a hose or pump sprayer. A pump sprayer is easier to control and to get a consistent fogging accomplished. This will slow the drawing of moisture out of the sand finish.

Something else that will help is adding a dash or two of molding plaster to the thinned down texture. This will help the texture set up faster when its put on the wall. Another good idea is to add some additional Keene's cement which will make for a stronger finish coat.

If the texture is to be knocked down, an indication that it's ready is a dulling of the surface. It will appear wet for a while, then slowly take on a flat look. If the texture is being applied over fresh basecoat that's been done the same day, the danger of checking is greatly reduced. It's pretty safe to help the texture along by putting a fan to a wall that needs some help getting rid of some of the moisture. Keep in mind with dry walls that it is good to drop back and check the surface now and then if it's going to be knocked down. This is especially important if the walls are not going to be painted. If the walls are dry and the texture gets to the stage where it's pretty hard, the troweling needed to knock it down can make some areas look darker or dirty. So check it frequently and this will be avoided.

Share This Story

Looking for a reprint of this article?
From high-res PDFs to custom plaques, order your copy today!

Robin Raymer, the "Plaster Man," is a veteran repair specialist, consultant and speaker on all aspects of the plaster trade. Robin is a 20-year veteran of the plastering trade and has produced a series of videos on the subject. Write to the Plaster Man c/o Walls & Ceilings, 2401 W. Big Beaver, Suite 700, Troy, Mich. 48084.

Recommended Content

JOIN TODAY
To unlock your recommendations.

Already have an account? Sign In

  • Abercrombie & Fitch

    EIFS in 2026: How Specialty Finishes Are Redefining Exterior Wall Systems

    As building codes, owner expectations, and design demands...
    Stucco/EIFS
    By: Regi Mendoza
  • proper air and vapor control

    From Energy Efficiency to Moisture Management: Why Air and Vapor Control Matter

    How proper air and vapor control within building...
    Building Envelope
    By: Benjamin Meyer AIA, LEED AP
  • Linear Metal Ceiling Beam Baffles

    Top 25 Ceiling Contractors of 2026

    Suspended ceilings demand precision, code compliance and...
    Ceilings
    By: Tanja Kern and John Wyatt
You must login or register in order to post a comment.

Report Abusive Comment

Manage My Account
  • eMagazine Subscription
  • Newsletters
  • Online Registration
  • Manage My Preferences
  • Subscription Customer Service

More Videos

Sponsored Content

Sponsored Content is a special paid section where industry companies provide high quality, objective, non-commercial content around topics of interest to the Walls & Ceilings audience. All Sponsored Content is supplied by the advertising company and any opinions expressed in this article are those of the author and not necessarily reflect the views of Walls & Ceilings or its parent company, BNP Media. Interested in participating in our Sponsored Content section? Contact your local rep!

close
  • medical professionals moving a patient on a stretcher through the halls of a medical building
    Sponsored byNational Gypsum Company

    What Does High Performance Mean When It Comes To Gypsum Boards?

Popular Stories

skyscraper

NYC Tower Failure Offers Warning for Wall and Ceiling Contractors

A compilation of interior design images and an American Flag

A History of Wall and Ceiling Systems in the U.S.

Ford Drywall crew at a jobsite using Dusty's robotic product

How Ford Drywall & Stucco Reduces Risk with Dusty

office interior under construction

Washington Law Puts Finishing Contractors Under Misclassification Spotlight

Events

January 1, 2030

Webinar Sponsorship Information

For webinar sponsorship information, visit www.bnpevents.com/webinars or email webinars@bnpmedia.com.

See our full library of webinars

View All Submit An Event

Products

2026 National Painting Cost Estimator

2026 National Painting Cost Estimator

See More Products

Related Articles

  • Plaster Man
    Finishes (Part 3): Take 10

    See More
  • Plaster Man
    Finishes (Part 1): Smooth on Old and New

    See More
  • The Plaster Man: The Trip Out West, Part 2

    See More

Related Products

See More Products
  • plaster and drywall

    Plaster and Drywall Assemblies Manual

  • Builder's Guide to Stucco, Lath & Plaster

See More Products
×

Connect with the industry’s leading resource for unparalleled insights and education.

Join thousands of industry professionals today. Shouldn’t you know what they know?

JOIN NOW
  • RESOURCES
    • Advertise
    • Contact Us
    • Directories
    • Store
    • Want More
  • SIGN UP TODAY
    • Create Account
    • eMagazine
    • Newsletters
    • Customer Service
    • Manage Preferences
  • SERVICES
    • Marketing Services
    • Reprints
    • Market Research
    • List Rental
    • Survey/Respondent Access
  • STAY CONNECTED
    • LinkedIn
    • Facebook
    • Instagram
    • YouTube
    • X
  • PRIVACY
    • PRIVACY POLICY
    • TERMS & CONDITIONS
    • DO NOT SELL MY PERSONAL INFORMATION
    • PRIVACY REQUEST
    • ACCESSIBILITY

Copyright ©2026. All Rights Reserved BNP Media, Inc. and BNP Media II, LLC.

Design, CMS, Hosting & Web Development :: ePublishing